
Do you have a slow internet connection or trouble visiting particular websites on your Windows computer?
You can alter your IP (Internet Protocol) and DNS (Domain Name System) settings to boost internet speed and fix website accessibility issues.
This post will examine how to improve your online experience on Windows 7, 10, and 11 by adjusting IP/DNS settings.
What is an IP and a DNS?

Let’s quickly define IP and DNS before adjusting their settings. Data transmission and reception over the Internet are governed by a set of protocols known as IP (Internet Protocol).
It enables data transmission by giving each networked device a unique numerical address.
Domain names, such as www.example.com, are converted into IP addresses by the DNS (Domain Name System).
It serves as a directory to assist your computer in finding the proper IP address linked to a specific website.
Why should I tweak IP/DNS settings?
You might think about modifying your IP/DNS settings for several reasons:
- Improving internet speed – You may be able to increase the speed and decrease the latency of your internet connection by optimizing your IP/DNS settings.
- Fixing any website access issues – There are instances when DNS-related issues make some websites inaccessible. You can resolve such problems by adjusting your IP/DNS settings.
- Improving security and privacy – Configuring IP/DNS settings can give an extra layer of security and privacy by blocking harmful websites and preventing DNS hijacking.
- Access to blocked content – In rare circumstances, adjusting IP/DNS settings can get around specific geographic limitations and open access to content only available in certain regions.
How can I tweak my IP/DNS settings on Windows?
1. Tweak IP/DNS settings on Windows 7
- Click the Network icon in the system tray, and choose Open Network and Sharing Center.
- Click on Change adapter settings from the left sidebar.
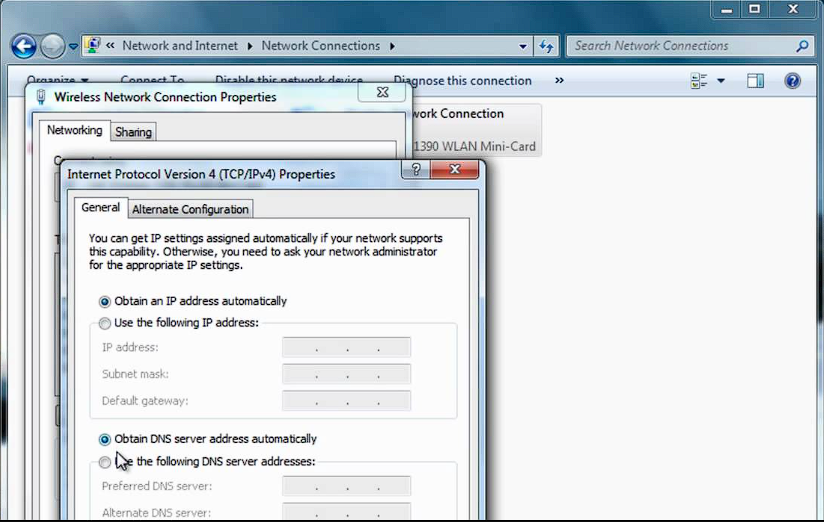
- Right-click the network connection you’re using, and choose Properties.
- Find the Internet Protocol Version 4 (TCP/IPv4), and double-click it.
- Inside the TCP/IPV4 properties, activate the Use the following IP address or Use the following DNS server addresses, and enter the desired values (can be obtained from your ISP or use a public DNS server like Google DNS (8.8.8.8 and 8.8.4.4).
- Click the OK button to apply the changes and close the window.
2. Tweak IP/DNS settings on Windows 10
- Open the Start menu and click the gear icon to open the Settings app.
- Choose Network & Internet from the list, and click Change Adapter Options.
- Right-click the network you’re using, and choose Properties.
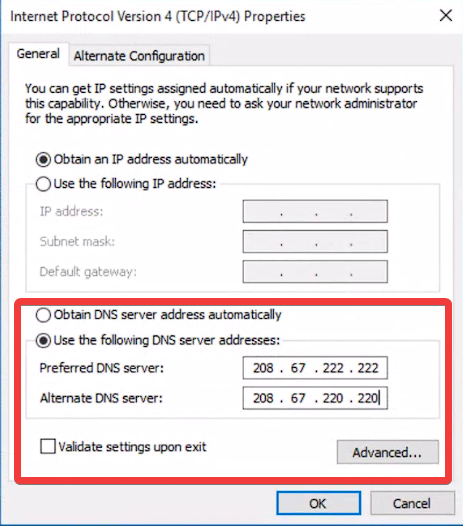
- Find Internet Protocol Version 4 (TCP/IPv4) in the respective list, and double-click it.
- Choose the Use the following IP address or Use the following DNS server addresses, and add the desired values.
- Click OK to save all the changes, and close the Properties window.
3. Tweak IP/DNS settings on Windows 11
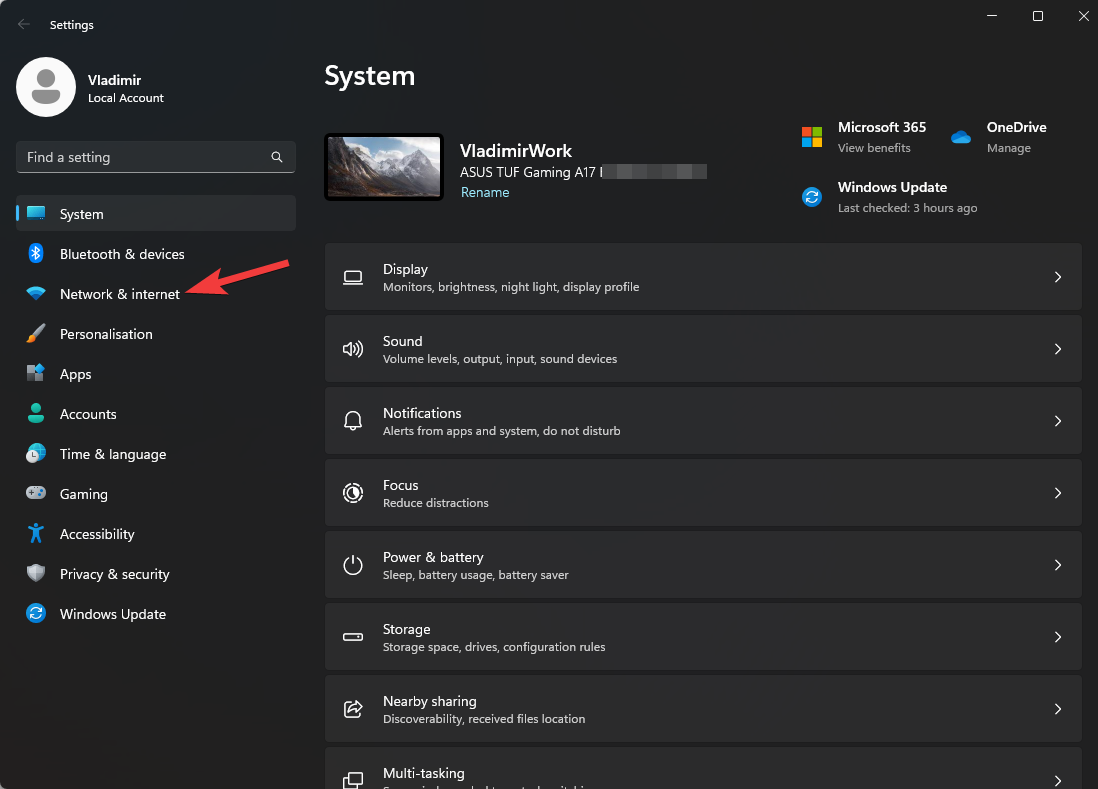
- Click the Start button, and open the Settings app.
- Select Network & Internet, and click on Advanced Network Settings.
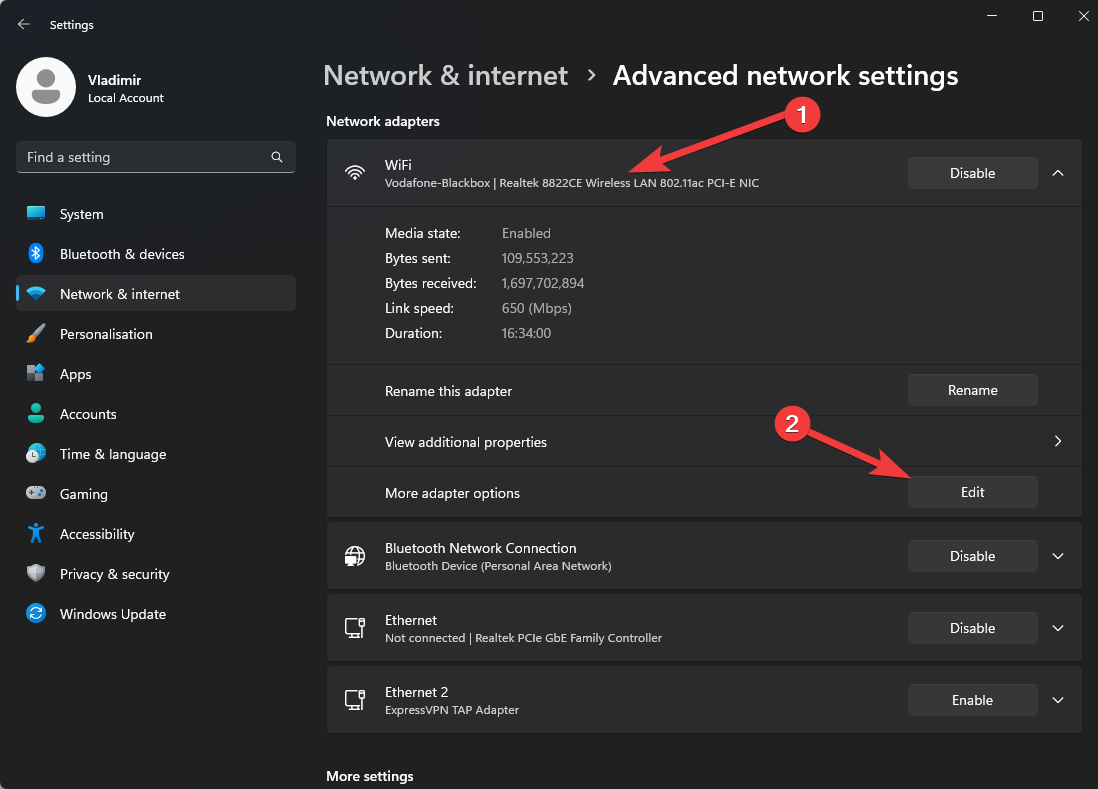
- Click the network connection you’re using, and click the Edit button in the More Adapter Options section.
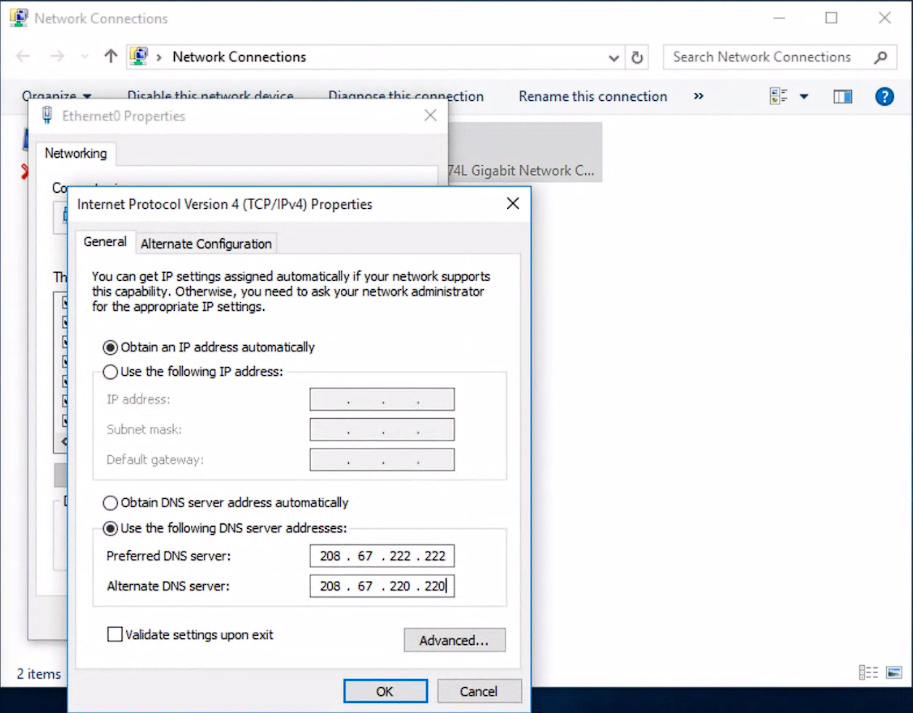
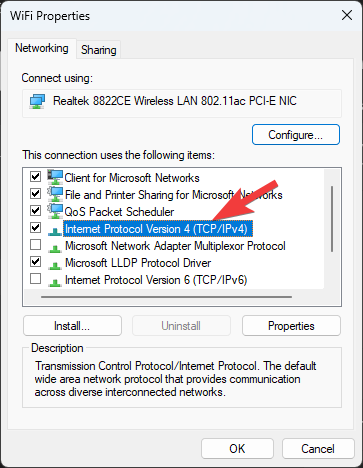
- Locate the Internet Protocol Version 4 (TCP/IPv4) and double-click on it.
- Choose the Use the following IP address or Use the following DNS server addresses, and enter the values you want to use.
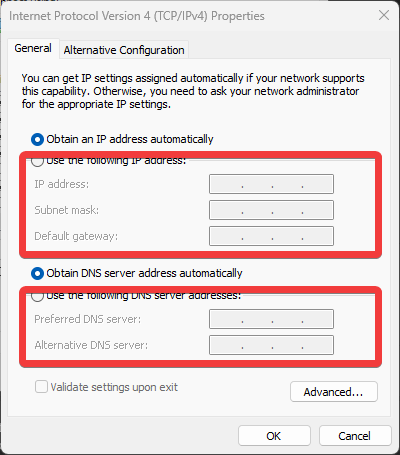
- Click OK to save the changes.
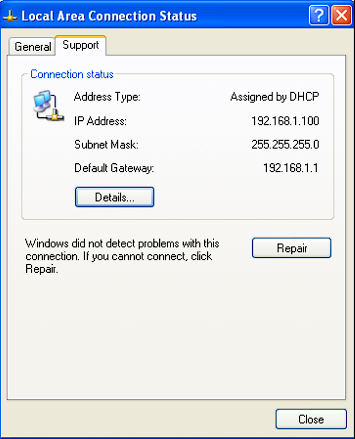
4. Verify the IP/DNS changes
It’s critical to make sure the adjustments you’ve made to your IP/DNS settings have been implemented after making them.
You can do this by taking the following steps:
- Press the Win + R keys to open the Run dialog, type cmd, and press Enter.
- Inside Command Prompt, type the following command and press Enter to run it:
ipconfig /all - Check if the IP address and DNS server values match the configuration you performed earlier. If they do, then the settings have been successfully applied.
The IP/DNS settings on your Windows 7, 10, or 11 computer can significantly impact how quickly you can access websites and how fast your internet connection is.
You can enhance your online experience by taking the actions mentioned above and making the required adjustments. Recall to double-check the adjustments, confirm the settings, and resolve any potential problems.
FAQ
- Can tweaking IP/DNS settings improve my online gaming experience?
Yes, optimizing your IP/DNS settings can reduce latency and provide a smoother gaming experience.
- Is it safe to use public DNS servers?
Public DNS providers like Cloudflare DNS and Google DNS are generally secure and can boost performance.
- Can I revert the IP/DNS settings to default if something goes wrong?
Yes, choosing the Obtain an IP address automatically and Obtain DNS server address automatically options in the network connection properties will allow you to undo the modifications at any time.

Vladimir Popescu
Verified at:
07/03/2023 10:31
Vladimir started writing articles about Windows because he has a natural interest in this topic, and he has been an avid professional user with more than 15 years of experience. He’s also been writing for WindowsReport.com, MSPoweruser.com and present in various other online publications on matters related to Windows and Windows servers.
Vladimir enjoys practicing Crossfit and making art when he’s not creating top articles with in-depth information.
Leave a Reply