
Efficient task management and the automation of repetitive jobs are now necessities in the digital era. Thanks to a useful application called the Task Scheduler, users of Windows may schedule and automate various tasks on their PCs.
Understanding and using the Windows Task Scheduler’s capabilities can significantly increase your productivity and help you save time, whether you’re a casual user or a business expert. This article explains the Windows Task Scheduler’s attributes, advantages, and practical uses.
What are the best practices for employing Task Scheduler on Windows?
- Organize tasks effectively – Use folders and subfolders to categorize tasks to keep your task library organized. The management of tasks is streamlined, and finding and changing specific tasks is made simpler.
- Configure error handling and notification settings – Configure appropriate error handling actions for activities to guarantee effective communication and troubleshooting in the event of failures. To quickly fix problems, you can create email notifications, execute personalized scripts, or show error messages.
- Protect scheduled tasks – By setting up the correct security settings, you can safeguard your scheduled operations. To protect your scheduled tasks from unauthorized access, assign the proper user permissions, restrict access to sensitive jobs, and enable encryption.
Is the Task Scheduler available in all versions of Windows?
Yes, most Windows editions, including Windows 10, Windows 8/8.1, Windows 7, and Windows Server editions, include the Task Scheduler.
What are the benefits of using the Task Scheduler?
- System maintenance and updates – Plan out maintenance tasks for your system, such as disk cleanup, defragmentation, and antivirus checks. Windows updates can also be automated to keep your machine current.
- Data backups and file synchronization – Automate data backups by setting up processes to copy crucial files and directories to external drives or cloud storage. Additionally, you may synchronize files between many places or devices.
- Employing scripted tasks and programs – Use the Task Scheduler to schedule scripted tasks or the execution of programs at predetermined intervals. Running batch files, PowerShell scripts, or command-line programs takes advantage of this.
How do I use Task Scheduler?
1. Accessing the Task Scheduler
- Press the Win + R keys to open the Run dialog box.
- Type taskschd.msc and press Enter.
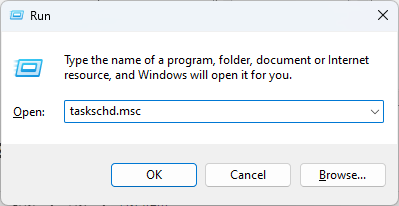
- The Task Scheduler window will open, showing you the library of tasks and options.
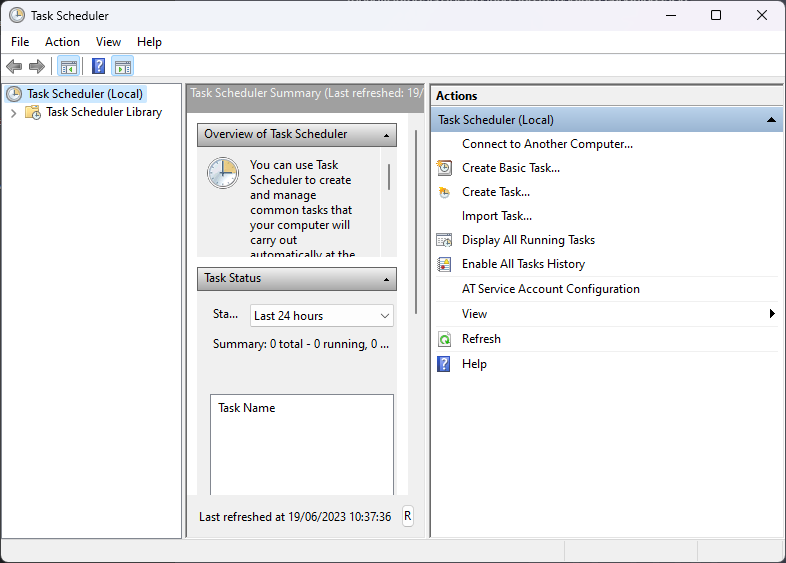
2. Navigating the interface
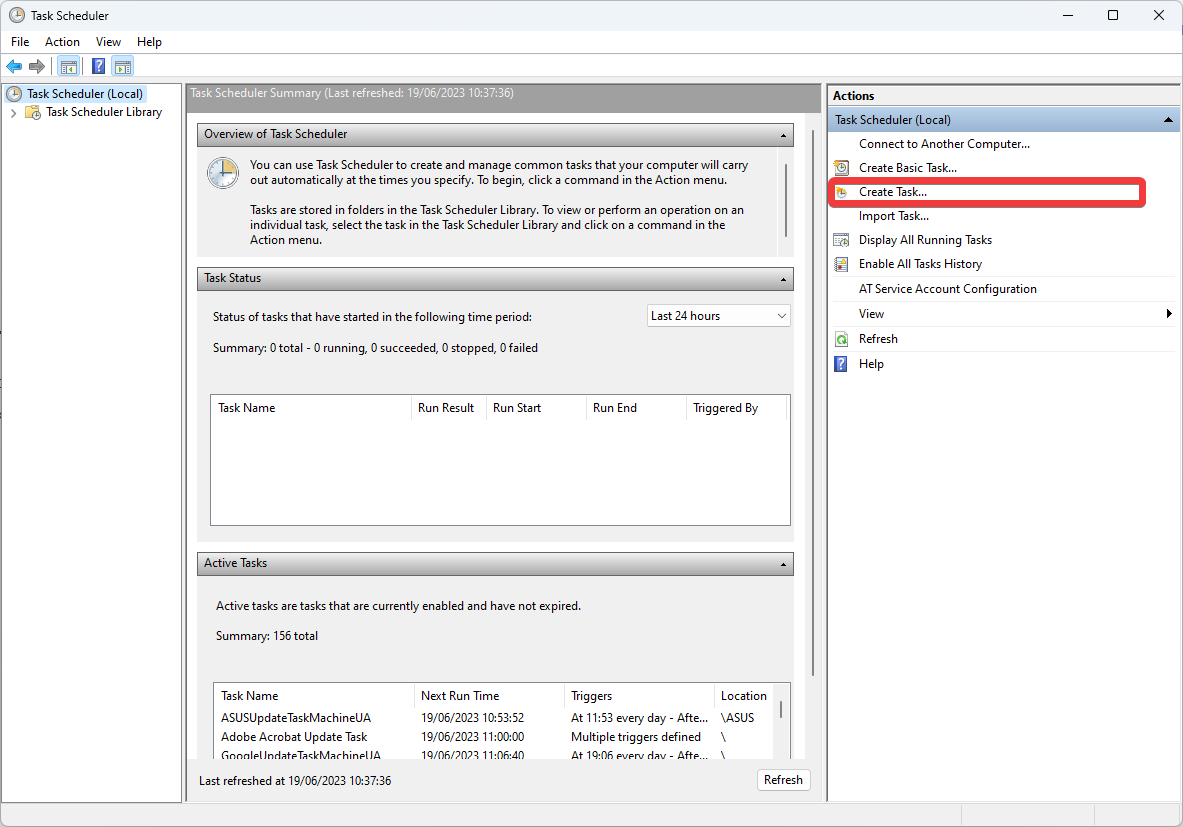
The Task Scheduler window is composed of a few elements:
- Task Scheduler Library
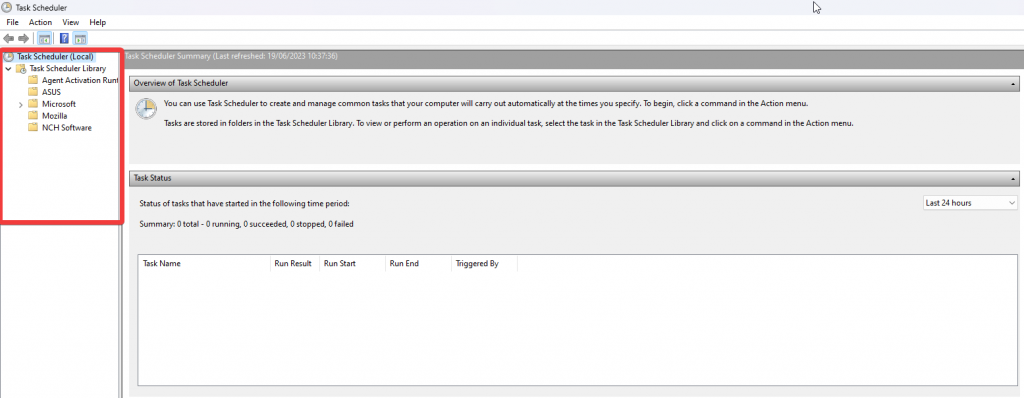
This element consists of a group of tasks, including user-created and system-default activities. This section enables you to navigate the explorer accordingly and reach your desired goal.
- Task Scheduler Summary
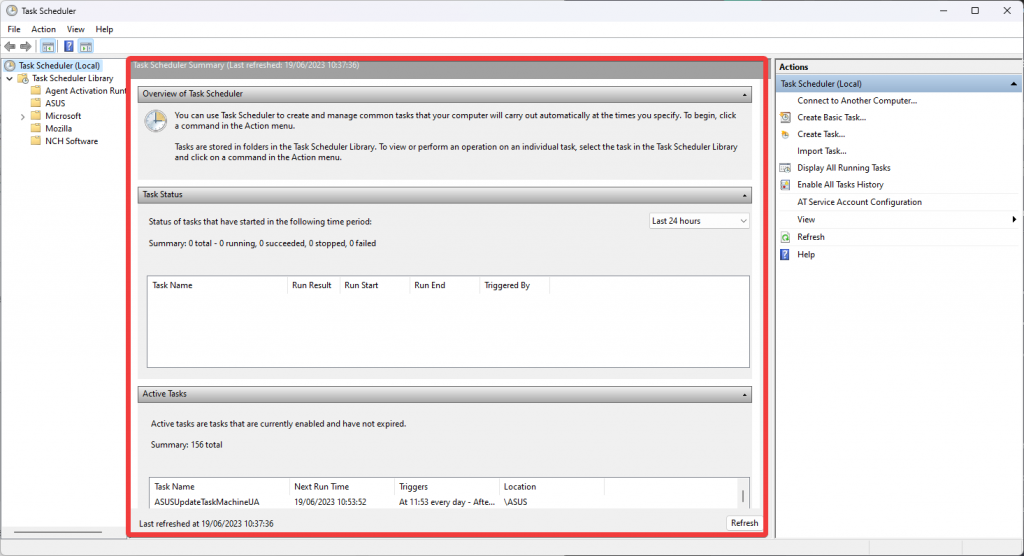
This Task Scheduler section gives you an overview of the task’s history and current state. This enables you to take decisive action regarding the tasks that have been scheduled.
- Actions Pane
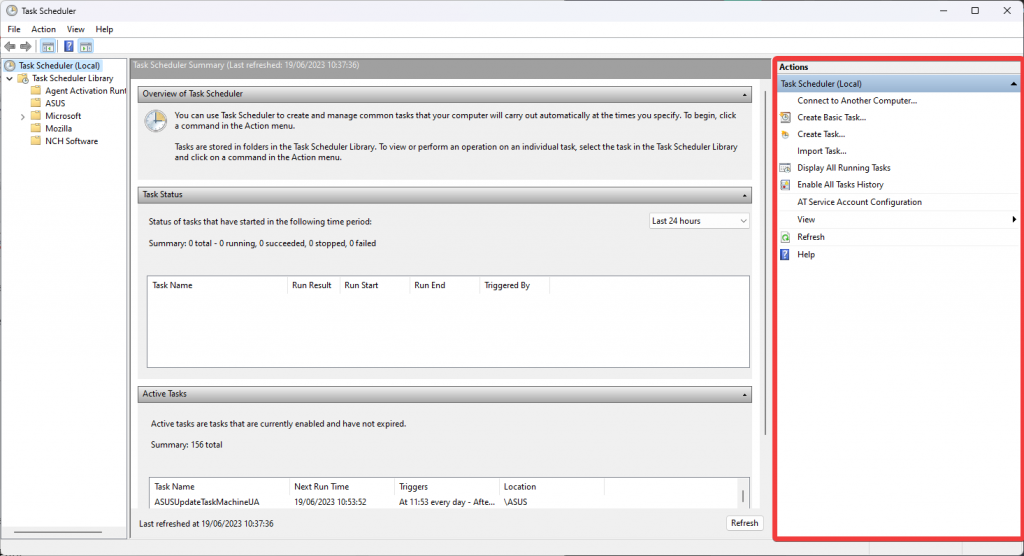
This part of the Task Scheduler application offers a variety of options for creating, importing, and running tasks.
- Task Details Pane
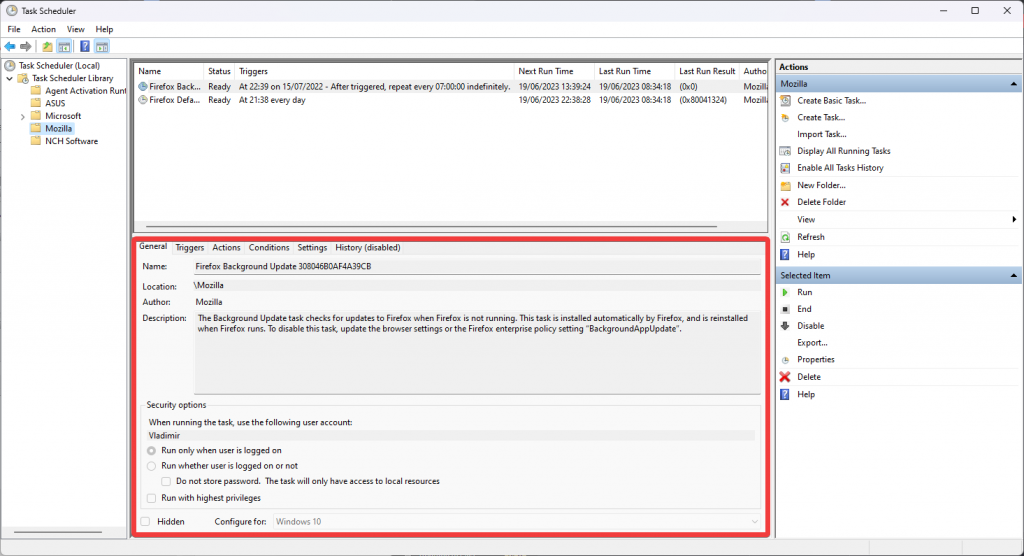
This part of the Task Manager appears after you have selected a specific task from the Task Scheduler Library and includes all the details of the assigned task, including triggers, actions, and particular conditions.
3. Creating basic tasks
- Click Create Basic Task inside the Action Pane in the Task Scheduler interface.
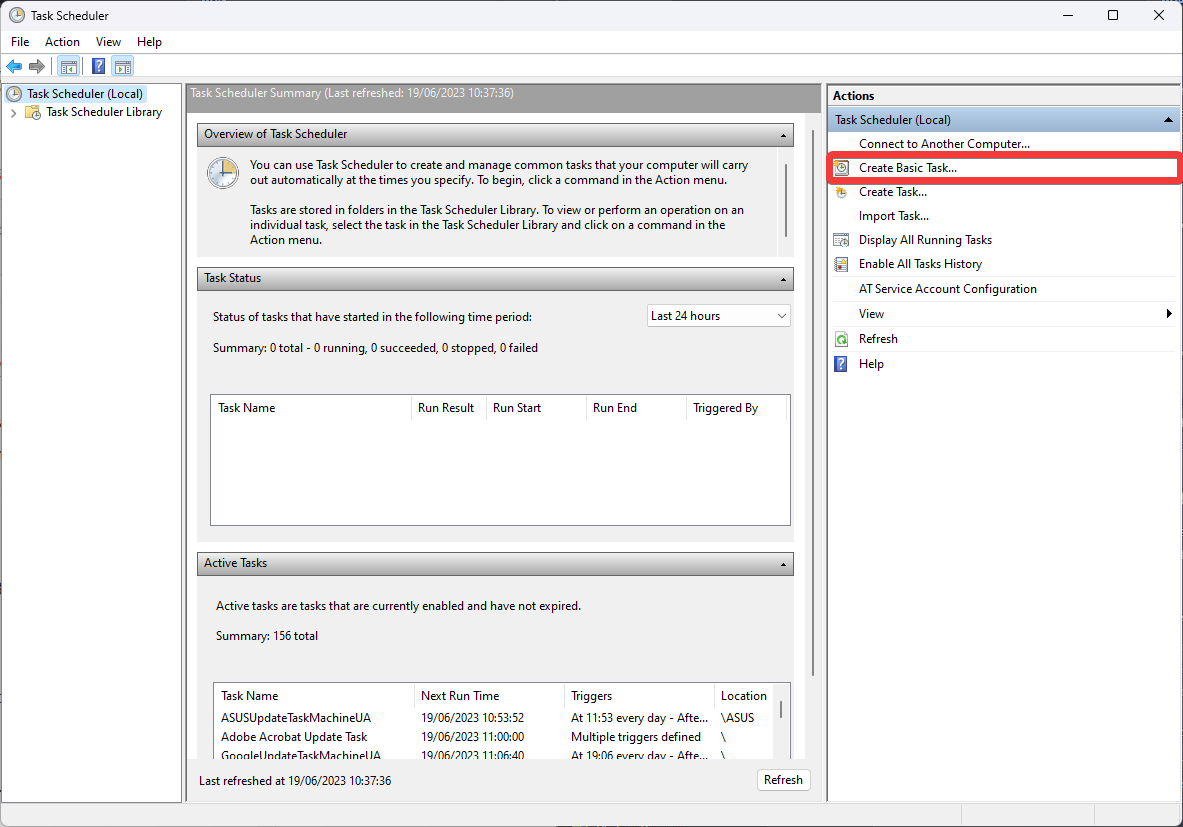
- Follow the on-screen instructions and define the task name, description, trigger, action, etc.
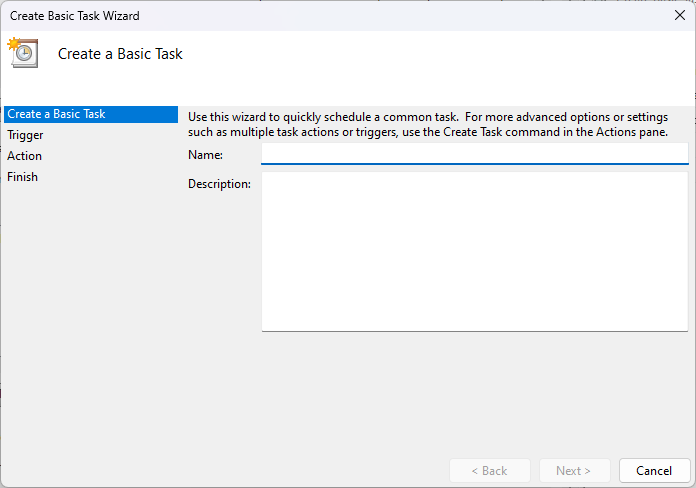
- Review the summary and click Finish to create the task.
4. Advanced task scheduling techniques
4.1. Triggering tasks based on Events
You can trigger tasks based on specific events, such as system startup, user login, or an application’s execution. This allows you to automate actions that depend on certain conditions or circumstances.
- Press the Windows key and type Task Scheduler in the search box.
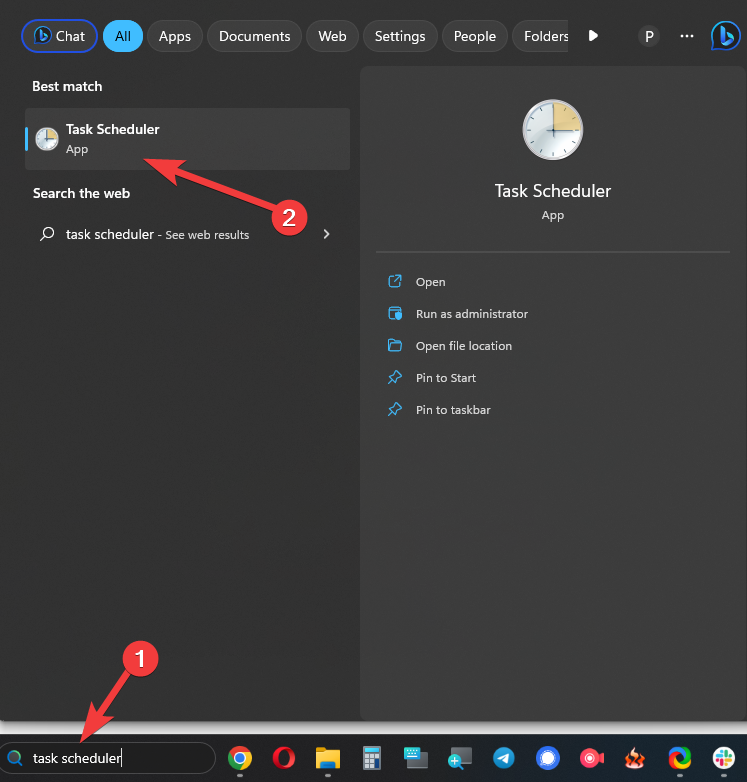
- Click the option with the same name from the results to open it.
- Click Create Task from the Action pane.
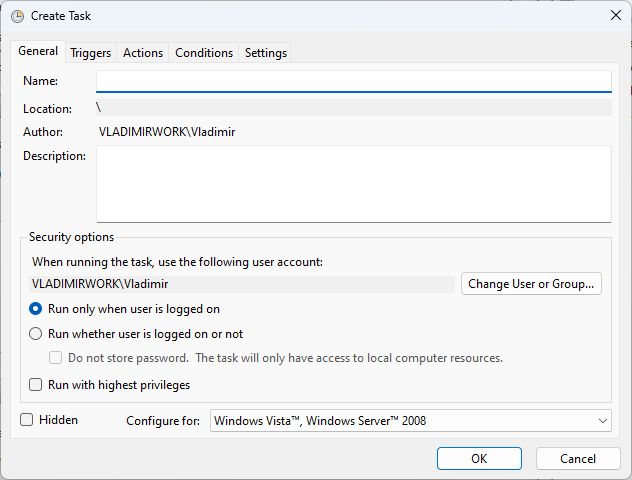
- Inside the General tab, click Create Task, and add a name and description of the task.
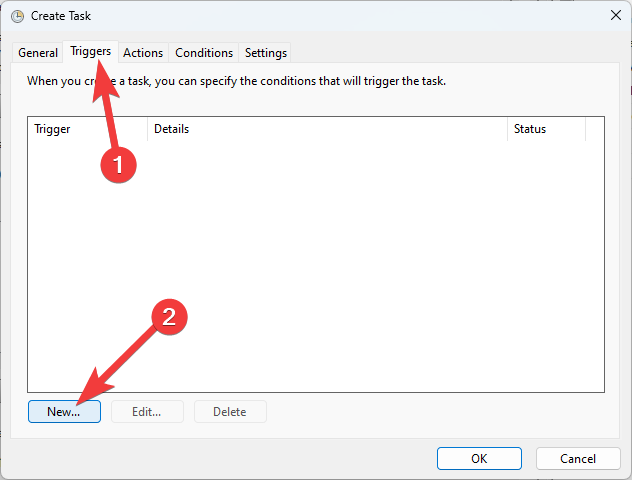
- Click the Triggers tab, and select New.
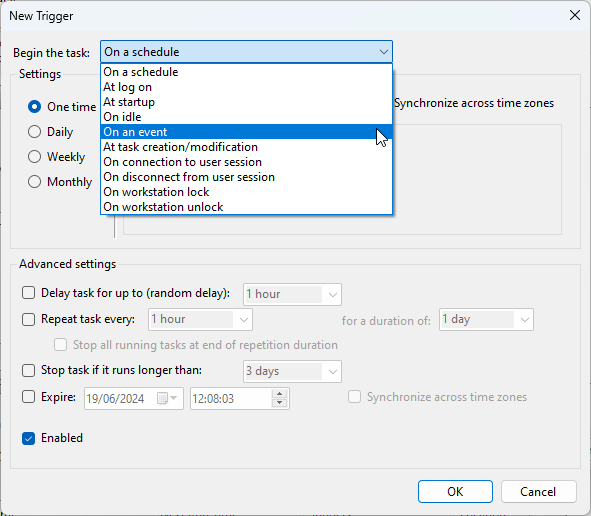
- Inside the New Trigger dialog, choose the type of trigger you want to use. (For event-based triggers, we recommend the On an Event option).
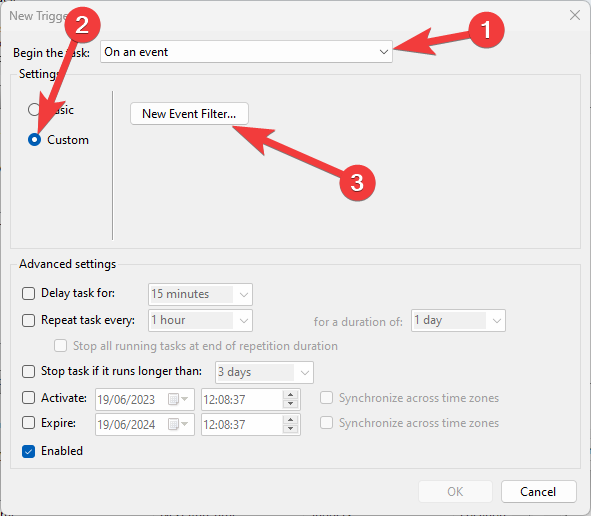
- Click the Custom button and then choose New Event Filter.
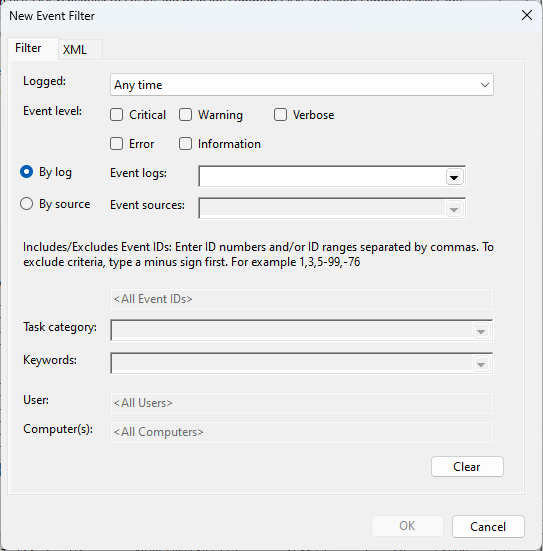
- Choose the events to use as triggers for your scheduling (event logs, specific event sources, event IDs, keywords, etc.), and click OK when finished.
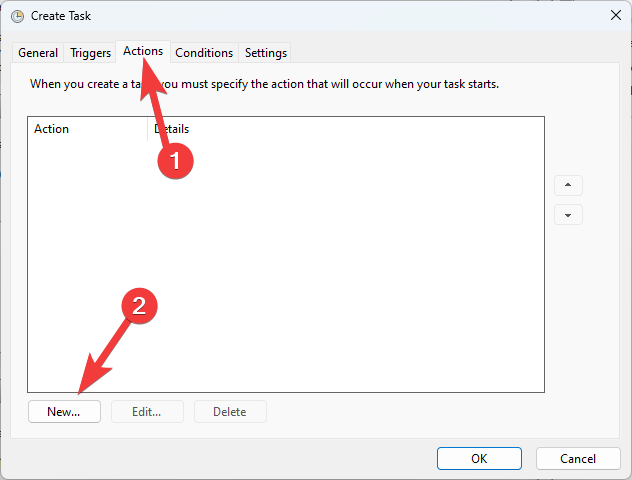
- Switch to the Actions tab, and click on New.
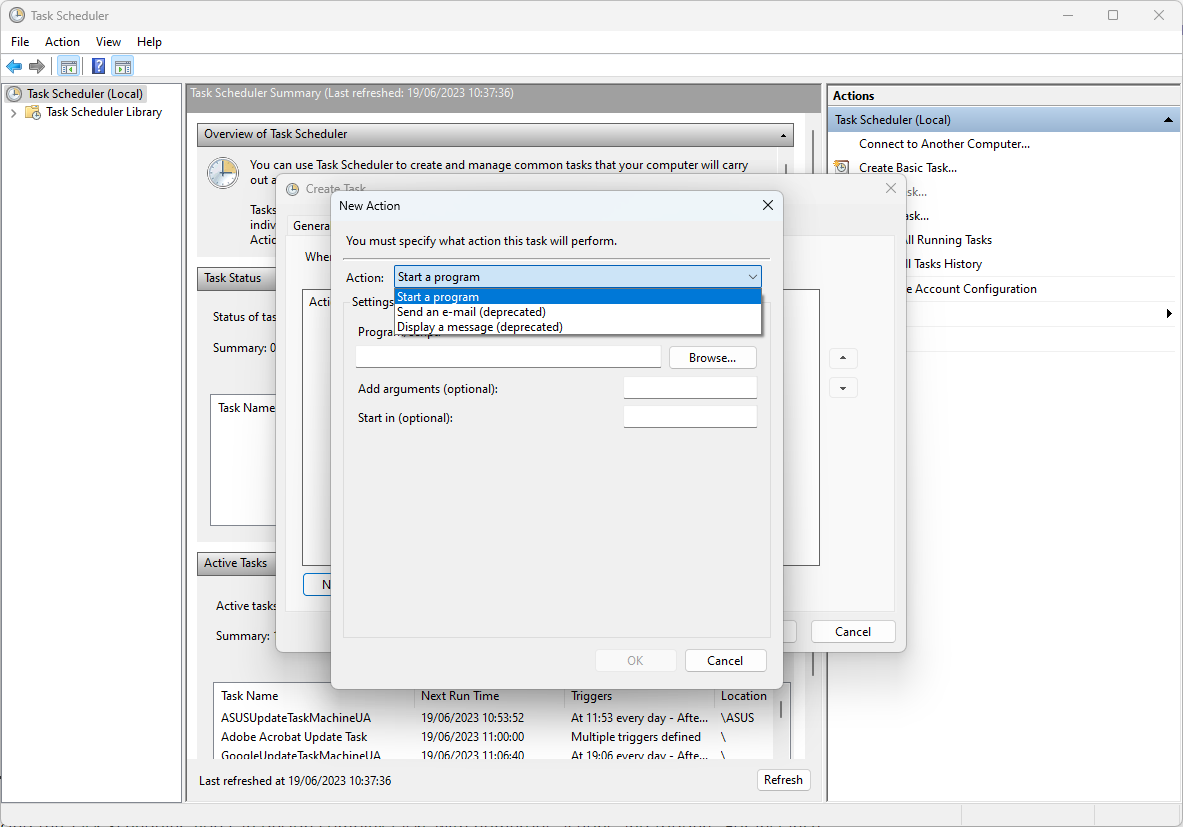
- Choose the action type you want to perform (running a program, sending an email, displaying a message, etc.)
- Provide the necessary details depending on the type of action you chose.
- Customize additional task settings (conditions, settings, security options, etc.)
- Save the task by clicking the OK button and then check it by right-clicking it inside the Task Scheduler and selecting Run.
4.2. Running tasks with specific conditions
With the help of the Task Scheduler, you may specify parameters for job execution, such as the presence of network connections, free time, or system power levels. You can ensure that tasks are executed only under the desired conditions by establishing precise requirements.
- Open the New Trigger dialog box by following steps 1 to 5 from the method described above.
- Choose the desired trigger for your newly-created task, and configure the trigger type and parameters. You can set a start time, recurrence pattern, and duration.
- To add some additional trigger conditions, click the Conditions tab.
- This will open the Edit Trigger dialog, and you will be able to specify conditions like:
Start only if the computer is idle for
Start only if the following network connection is available. - Click OK after you’re satisfied with the configuration of the trigger.
- This will open the Edit Trigger dialog, and you will be able to specify conditions like:
- Open the Actions tab, click New, and choose the action type you want to perform. It could be running an app, sending an email, etc.
- Configure the parameters of the action. For example, if you choose to run an app, specify the path for it and the command-line arguments needed.
- You can also customize the additional tasks by modifying conditions, security options, and settings.
- Save the task by clicking OK and then test it by right-clicking it and choosing Run.
4.3. Managing task actions and triggers
Using the Task Scheduler, you can design complex tasks with numerous actions and triggers. For instance, you could build a task to launch a program, run a script, and then send an email alert.
The steps described above will ensure that your tasks and actions are set up, applied, and run optimally.
Use the CleanMem tool
Memory utilization is an essential factor that significantly affects a system’s performance. The system’s responsiveness may be impacted as apps and processes use memory resources. CleanMem can save the day in this situation.
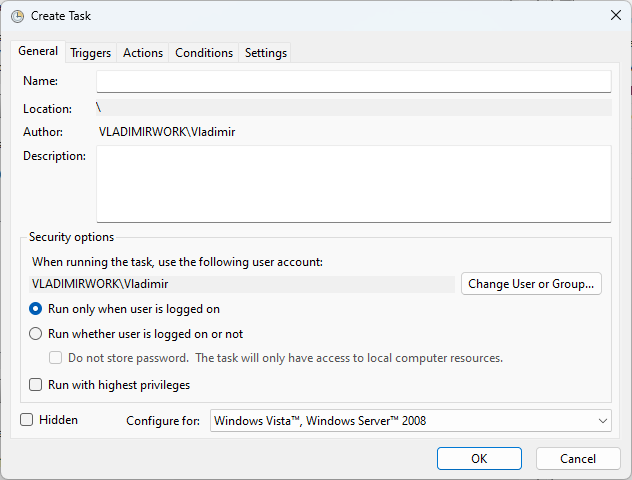
1. General tab

CleanMem efficiently optimizes how your system uses memory resources thanks to its clever algorithms and sophisticated memory management strategies.
This app assists in preventing memory leaks and lessens memory fragmentation by shrewdly clearing up memory space that is no longer being actively used. This proactive technique ensures that memory is assigned to your system effectively, allowing programs to function without stuttering or crashes.
- You can choose what account to run the program under
- Customize the way the program is run
- Capability to run with the highest privileges
- It can be run Hidden by ticking the respective option
- You can customize the configuration depending on your OS’s version
As you can see, the General tab is straightforward to understand and use, so let’s move on to the next step.
2. Triggers tab
The Triggers tab enables you to create specific triggers for the scheduling action you want to initiate.
You can create a new trigger by clicking the New button and editing all required information.
After creating the trigger, you can edit it by clicking the respective task from the list and choosing Edit.
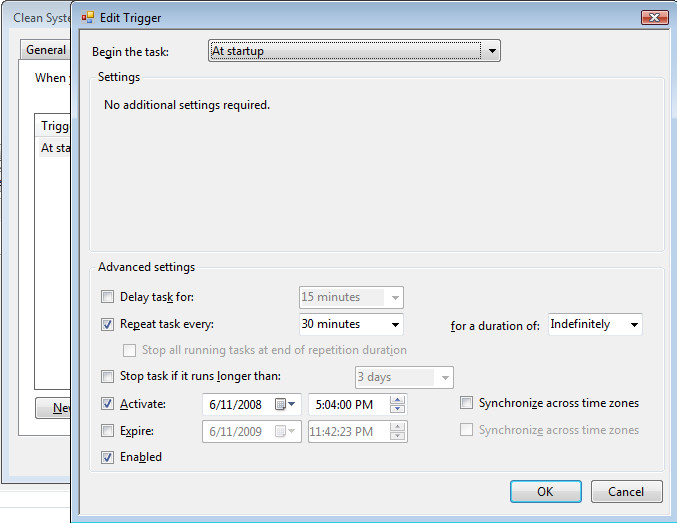
As you can see from the image above, you can set various options to customize your task according to your needs.
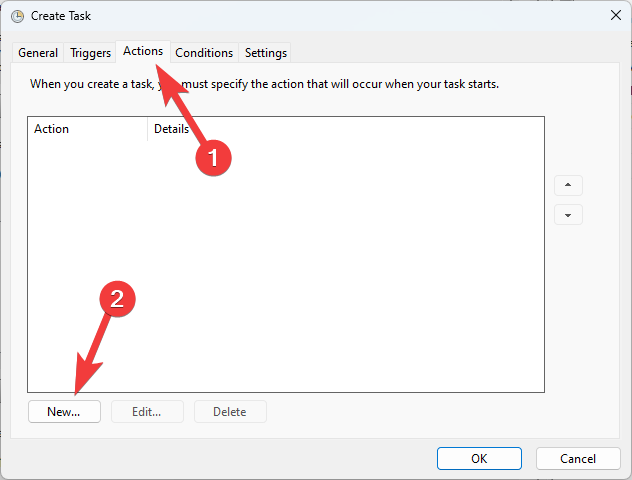
3. Actions tab
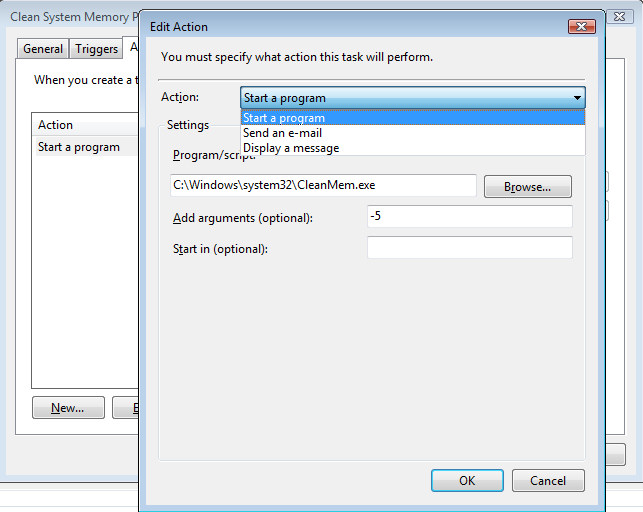
Now that we have the triggers set up, you can choose what action to take when a trigger is set off.
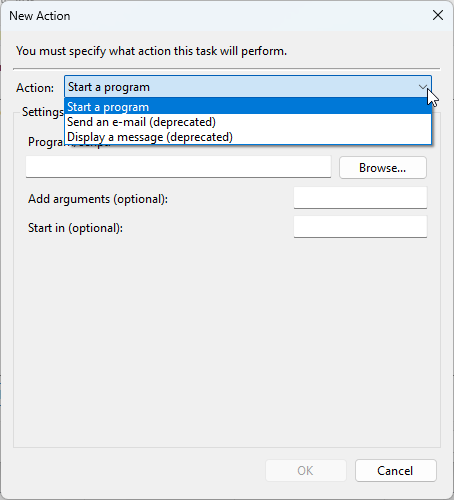
In our example, we will start a program. Still, we have two other options in the drop-down menu: sending an email or displaying a message (these can be great options for administrators working in a network environment).
As you can see from the image above, you can choose the action, run a program or script by adding a path to the software, and modify arguments to suit your needs. Click OK after the setup on this page is completed, and move on to the next section.
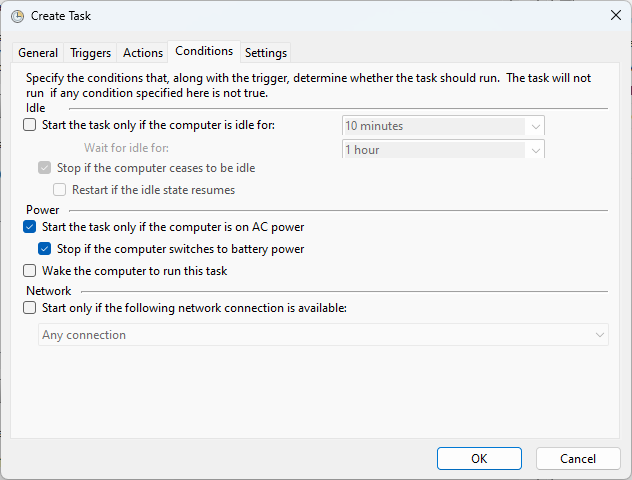
4. Conditions tab
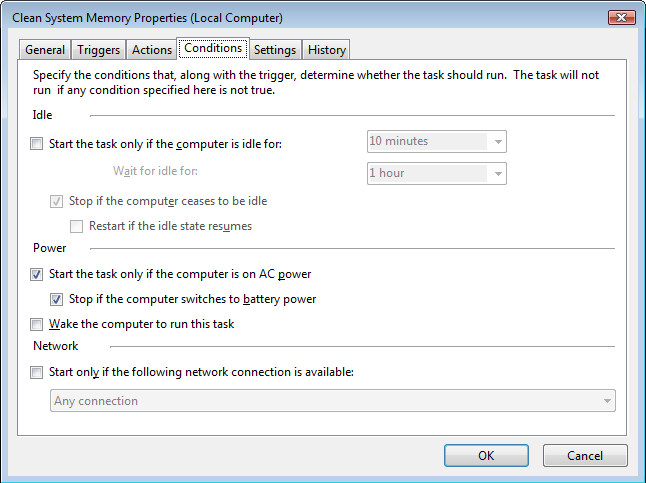
When using a battery-operated device, such as a laptop, or when the power is out, and the computer uses a battery backup, the conditions tab allows you even more control. If you open CPU-intensive software when using a battery-operated device, the battery will run out!
Extra options include when the computer is idle and when a network connection is active.
5. Settings tab
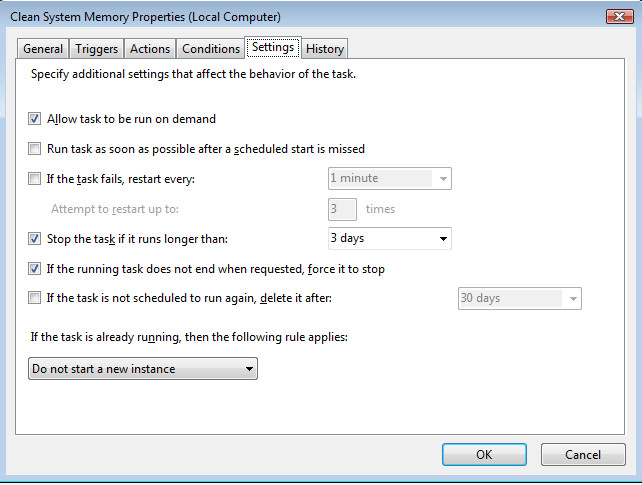
The settings tab now gives us more control over our scheduling program.
The Settings tab gives you even more control over the programs we are running and has some other valuable features included:
- Allow task to be run on demand – This option ensures that tasks will be run depending on the triggers you have created
- Do not start a new instance – this option enables admins to schedule a task for a program and not worry about having two entries of the tasks open
Even though the menu is very straightforward, having a good idea about what each tab does can help you streamline your task-scheduling process.
6. History tab
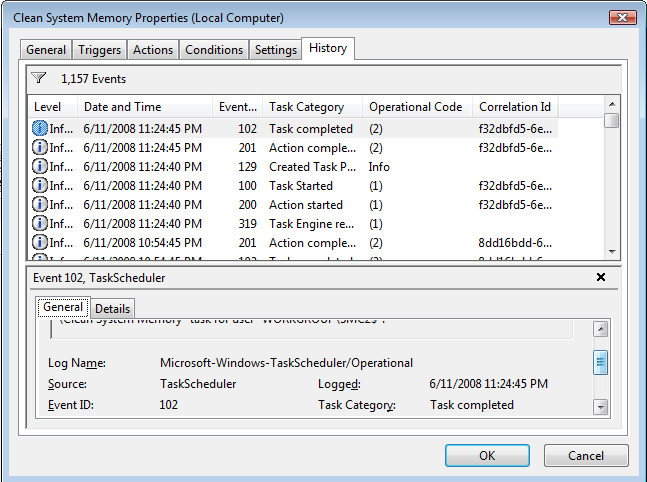
The History tab enables you to keep an eye on everything running and thus react to errors promptly.
This section is helpful for everybody, but it applies even more to technicians who need a quick overview of the situation they are trying to fix or tweak.
As you can see, the Windows task scheduler is surprisingly robust and gives you the kind of automated control you need. You can run anything you like, defrags, system scans, anything you require.
Even more, using software like cleanmem enables you to fully customize any task, trigger, and circumstances of those actions occurring.
For the standard home user, this may seem like a tool you don’t need, but that’s not true. You can schedule all your system maintenance to run automatically at night while you’re asleep and then, once it’s all done, shut down your PC automatically.
Of course, from a tech’s or administrator’s perspective, this tiny gadget can be a lifesaver while maintaining the flawless operation of one to a thousand systems.

Vladimir Popescu
Verified at:
07/03/2023 10:31
Vladimir started writing articles about Windows because he has a natural interest in this topic, and he has been an avid professional user with more than 15 years of experience. He’s also been writing for WindowsReport.com, MSPoweruser.com and present in various other online publications on matters related to Windows and Windows servers.
Vladimir enjoys practicing Crossfit and making art when he’s not creating top articles with in-depth information.
Leave a Reply