
Users of many operating systems increasingly use Windows’ right-click menu to perform routine tasks. We have access to a wide range of features and settings that improve our user experience and efficiency.
This article will explore the realm of Right-Click Tweaks created exclusively for Windows 2000, XP, Vista, 2003, 2008, and 7.
With these adjustments, you can maximize your computing experience and modify your right-click menu. They’ll also help you streamline your workflow. Explore the possibilities by jumping right in!
Here are some reg tweaks to add right-click options to My Computer and other valuable opportunities.
What are the best right-click tweaks for my Windows PC?
1. Add the Add/Remove Programs option to right-click menu of My Computer
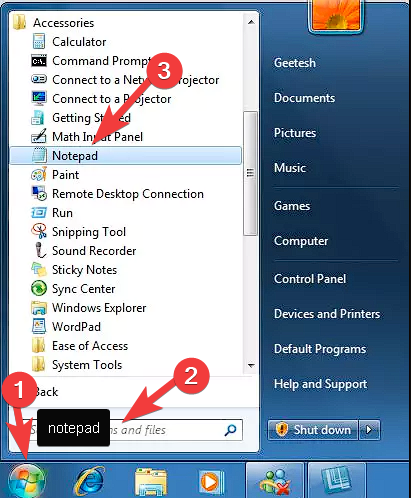
- Open a new Notepad file by searching it in the Start menu.
- Copy-paste the following code path inside the newly-created Notepad file:
[HKEY_CLASSES_ROOTCLSID{20D04FE0-3AEA-1069-A2D8-08002B30309D}shellAdd/Remove Programscommand]
@="control appwiz.cpl"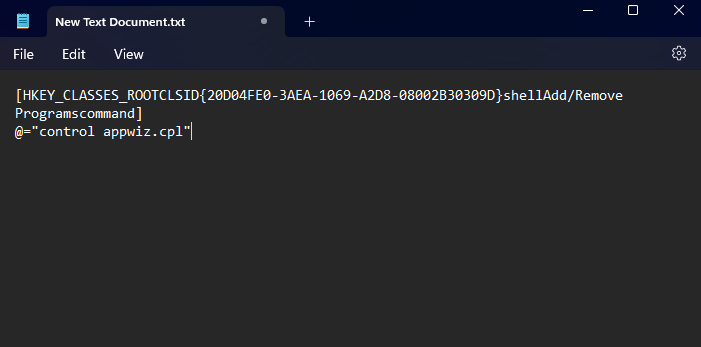
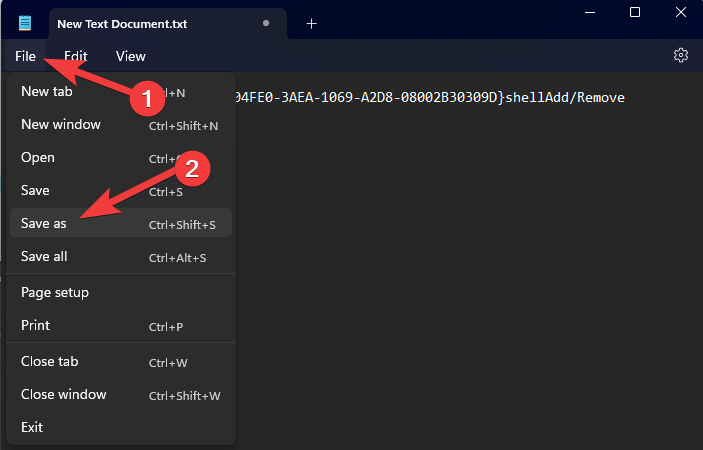
- Use the Save as option from the menu and set name file.reg (adding the .reg file type is very important, feel free to replace ‘name file’ with your desired words).
- Run the saved file by double-clicking it.
2. Add Device Manager to right click menu on My Computer
- Run a new iteration of Notepad from your desktop.
- Copy-paste the following code inside the text file:
[HKEY_LOCAL_MACHINESOFTWAREClassesCLSID{20D04FE0-3AEA-1069-A2D8-08002B30309D}shellDevMgr]
@="Device Manager"
[HKEY_LOCAL_MACHINESOFTWAREClassesCLSID{20D04FE0-3AEA-1069-A2D8-08002B30309D}shellDevMgrcommand]
@="mmc.exe devmgmt.msc"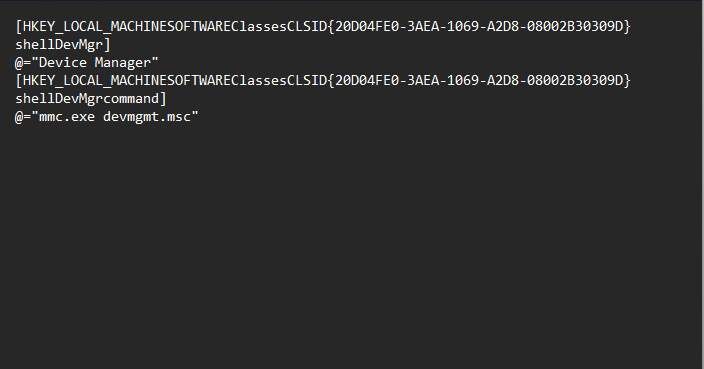
- Use the Save as option, and choose a .reg format, and run the file to apply the code.
3. Add MSconfig to the right-click menu of My Computer
- Create a new Notepad file.
- Copy and paste the following code path inside the text file:
[HKEY_CLASSES_ROOTCLSID{20D04FE0-3AEA-1069-A2D8-08002B30309D}shellmsconfig]
@="MSconfig"
[HKEY_CLASSES_ROOTCLSID{20D04FE0-3AEA-1069-A2D8-08002B30309D}shellmsconfigcommand]
@="msconfig.exe"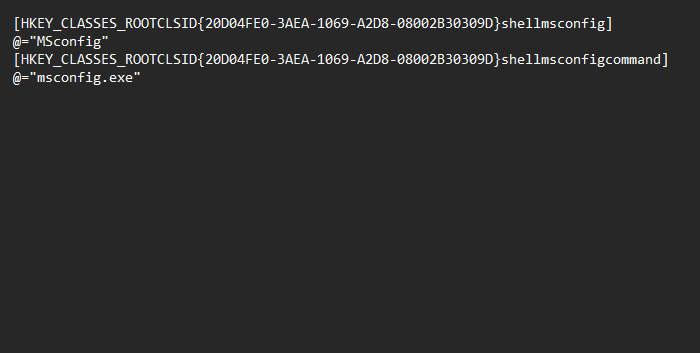
- Save the file with a .reg format, and run it to apply the settings.
4. Add System Properties to the right-click menu of My Computer
- Open a new notepad file on your PC.
- Copy the following code and paste it inside your text file:
[HKEY_CLASSES_ROOTCLSID{20D04FE0-3AEA-1069-A2D8-08002B30309D}shellAdvSysProp]
@=hex(2):53,00,79,00,73,00,74,00,65,00,6d,00,20,00,50,00,72,00,6f,00,70,00,65,
00,72,00,74,00,69,00,65,00,73,00,00,00

[HKEY_CLASSES_ROOTCLSID{20D04FE0-3AEA-1069-A2D8-08002B30309D}shellAdvSysPropcommand]
@=hex(2):63,00,6f,00,6e,00,74,00,72,00,6f,00,6c,00,20,00,73,00,79,00,73,00,64,
00,6d,00,2e,00,63,00,70,00,6c,00,00,00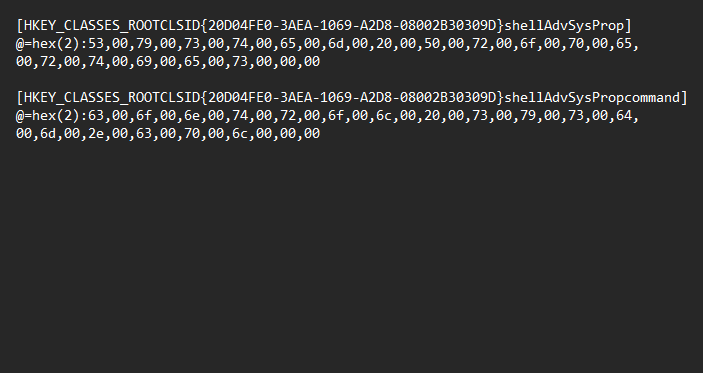
- Change the file name to Name.reg, and save it in an accessible location.
- Run the newly-created file to apply the settings.
5. Add Command Prompt to your right-click menu of a folder
- Create a new Notepad file.
- Open it and copy-paste the following code:
[HKEY_CLASSES_ROOTFoldershellCommand Prompt]

[HKEY_CLASSES_ROOTFoldershellCommand Promptcommand]
@="cmd.exe /k pushd %L"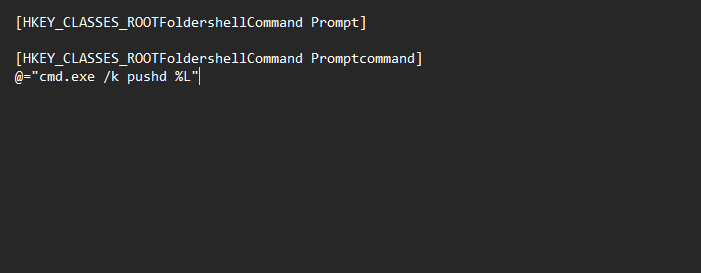
- Save the text file by using the Save as menu, with a name of your choosing but add .reg to change the format.
- Run the file from the location of its creation to apply the settings.
6. Add the Copy to Folder and Move to Folder options to right click sub-menu
- Open a new Notepad document and copy-paste the following code:
[HKEY_CLASSES_ROOTAllFilesystemObjectsshellexContextMenuHandlers{C2FBB630-2971-11D1-A18C-00C04FD75D13}]

[HKEY_CLASSES_ROOTAllFilesystemObjectsshellexContextMenuHandlers{C2FBB631-2971-11D1-A18C-00C04FD75D13}]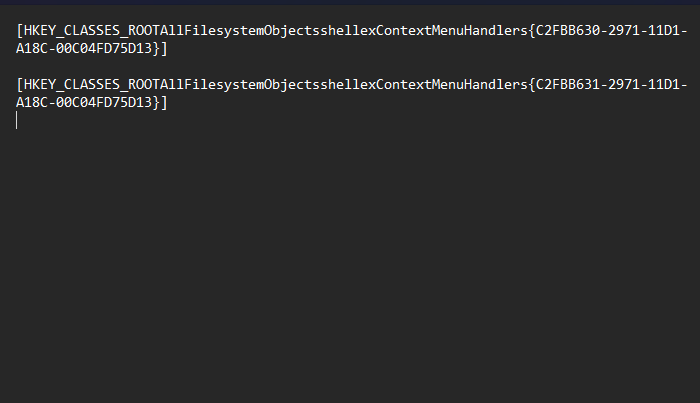
- Save the newly-created file by using the Save as option with a .reg format, and then run it to apply the settings.
7. Add Right-click Reg and Unreg to DLL and OCX file types
- Create a new Text Document (Notepad) file on your desktop.
- Copy-paste the following code inside the text file:
[HKEY_CLASSES_ROOT.dll]
@="dllfile"
[HKEY_CLASSES_ROOTdllfileshell]
[HKEY_CLASSES_ROOTdllfileshellRegister]
[HKEY_CLASSES_ROOTdllfileshellRegistercommand]
@="c:\windows\system32\regsvr32.exe "%1""
[HKEY_CLASSES_ROOTdllfileshellUn-Register]
[HKEY_CLASSES_ROOTdllfileshellUn-Registercommand]
@="c:\windows\system32\regsvr32.exe /u "%1""
[HKEY_CLASSES_ROOT.ocx]
@="ocxfile"
[HKEY_CLASSES_ROOTocxfileshell]
[HKEY_CLASSES_ROOTocxfileshellRegister]
[HKEY_CLASSES_ROOTocxfileshellRegistercommand]
@="c:\windows\system32\regsvr32.exe "%1""
[HKEY_CLASSES_ROOTocxfileshellUn-Register]
[HKEY_CLASSES_ROOTocxfileshellUn-Registercommand]
@="c:\windows\system32\regsvr32.exe /u "%1"" - Save the file with a .reg format by using the Save as option, and run it to apply the new settings.
Your right-click menu has untapped potential that can significantly improve your computer experience. You may adapt the right-click menu to fit your workflow and boost productivity by personalizing the options, adding sub-menus, and investigating third-party programs.
Always create backups to protect your settings and use caution while making changes to the Windows Registry. Take advantage of the power of right-click tweaks in Windows 2000, XP, Vista, 2003, 2008, and 7 to open up a world of possibilities.

Vladimir Popescu
Verified at:
07/03/2023 10:31
Vladimir started writing articles about Windows because he has a natural interest in this topic, and he has been an avid professional user with more than 15 years of experience. He’s also been writing for WindowsReport.com, MSPoweruser.com and present in various other online publications on matters related to Windows and Windows servers.
Vladimir enjoys practicing Crossfit and making art when he’s not creating top articles with in-depth information.
Leave a Reply