
It is unpleasant to experience sudden PC problems when carrying out routine duties. Fortunately, Windows comes with several practical command-line tools, sometimes known as Windows service commands, that may help you troubleshoot and fix various problems.
This article will examine Windows repair commands, including examples, their functionality, locations and uses, and the best ways to use them based on your requirements.
What are Windows repair commands?
Windows repair commands are a set of tools that enable you to repair Windows by using the command line to run various diagnostic and repair activities on Windows.
These commands are used primarily when Windows won’t boot normally or other troubleshooting procedures.
How do Windows repair commands work?
You can utilize the command line to carry out particular actions on your system using the Windows repair commands. Each command has a unique function, such as fixing registry issues, recovering system files, or fixing file system errors.
You can frequently fix problems with these tools that would otherwise force you to complete the reinstallation of Windows.
How do I run DISM and SFC commands?
Command Prompt and Powershell can be accessed by using the following methods:
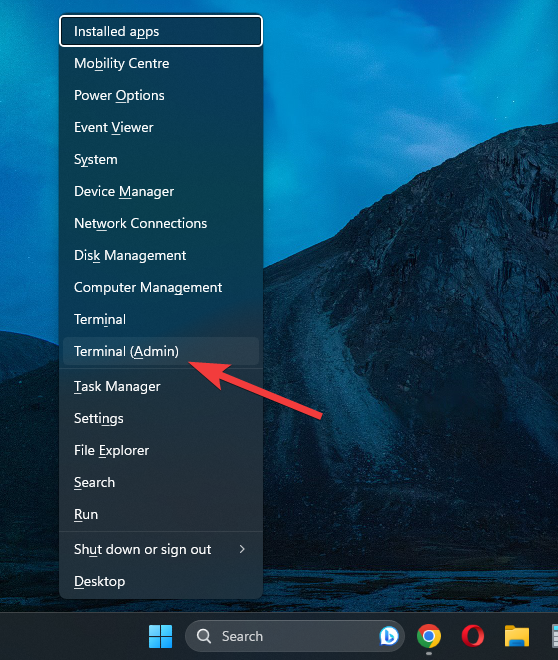
- Press the Win + X key combination on your PC, and choose Command Prompt (Admin), PowerShell (Admin), or Terminal (Admin) from the list.
- Press the Win + R keys to open the Run dialog, and type PowerShell or Command Prompt.
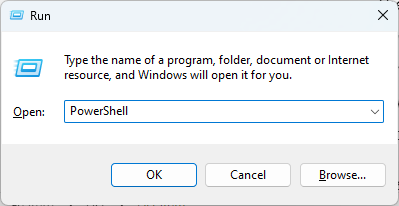
- Choose the respective app from the list.
Note: It is important to remember that some command-line programs for Windows repair need administrative access to be used.
What are the best Windows commands for system repair?
1. Use Command Prompt or PowerShell
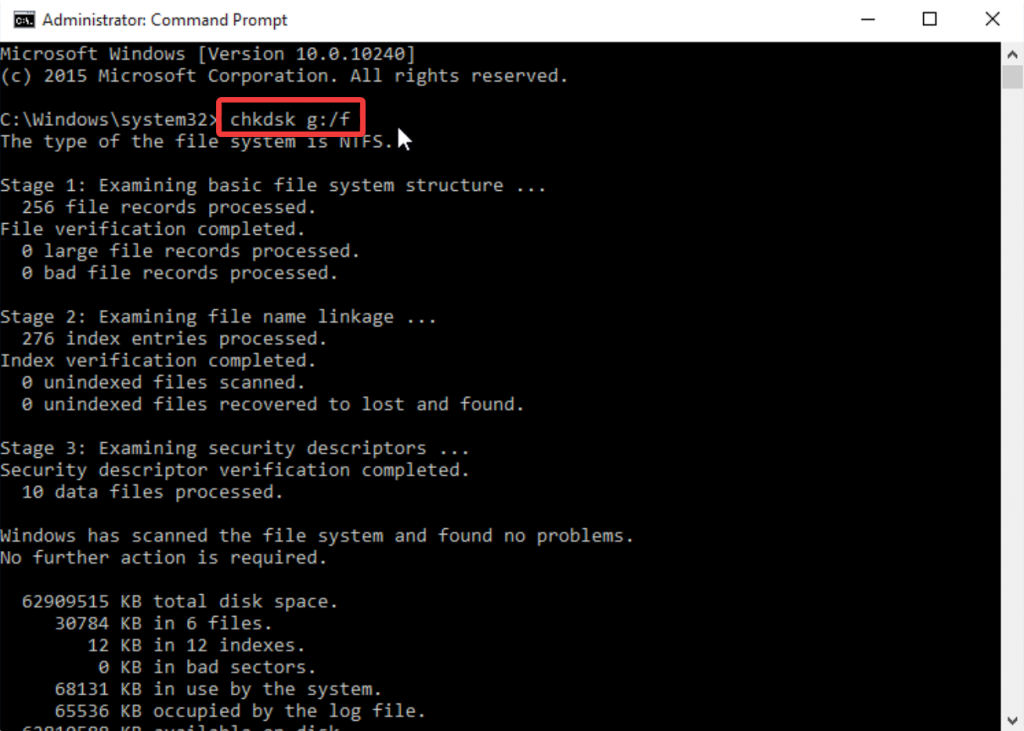
- chkdsk – This program checks the file system for errors and fixes any it finds.
To run it, open the Command Prompt with one of the methods described above, enter the following command, and press Enter to run it:chkdsk C: /f /r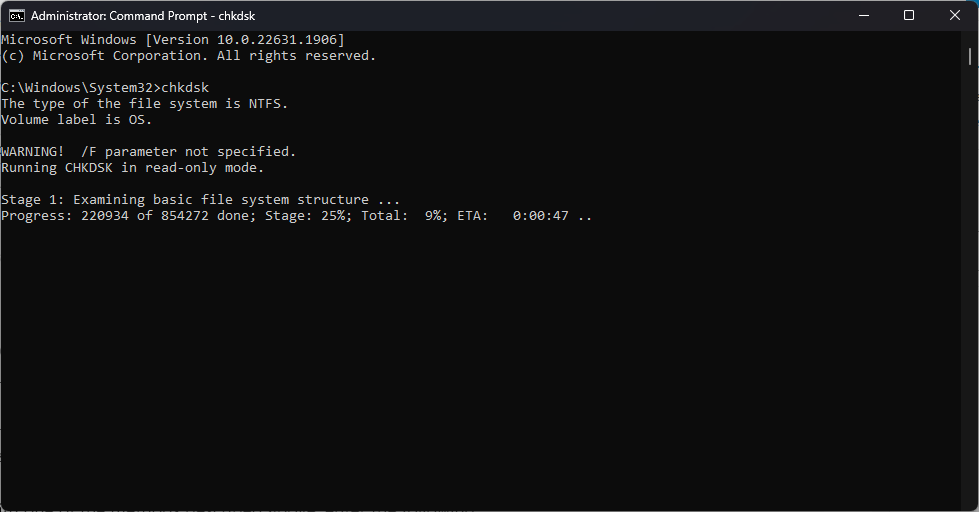
This will check the C/: disk for faults and try to fix any that are found.
- sfc /scannow – This command scans the system files for errors and fixes them using a cached copy.
Open the Command Prompt, enter the following command, and press the Enter key to run it:sfc /scannow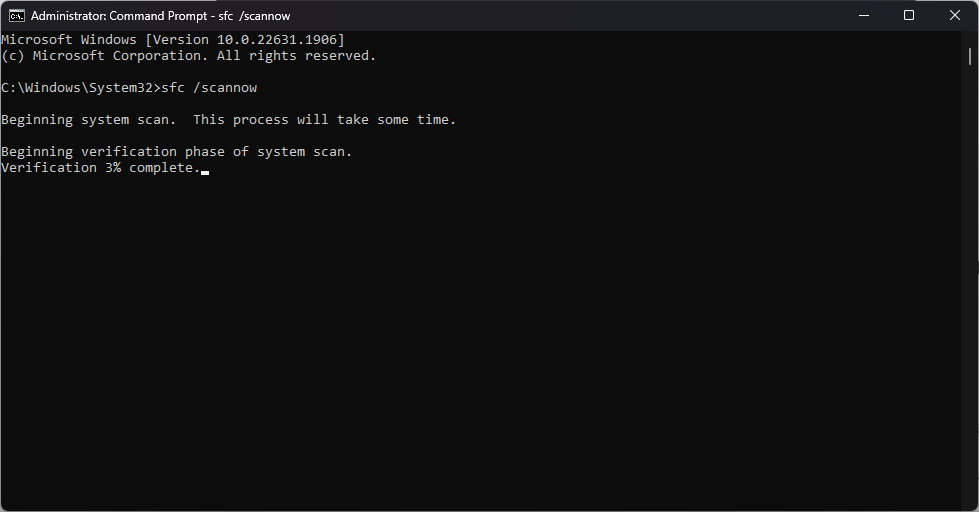
The system files will be checked, and the repair process will be initiated for the ones that need it. - dism /online /cleanup-image /restorehealth – Replaces faulty system files to fix the Windows image.
To successfully run this command, open the Command Prompt as an administrator first. Then, copy-paste the following command and press Enter to run it:dism /online /cleanup-image /restorehealth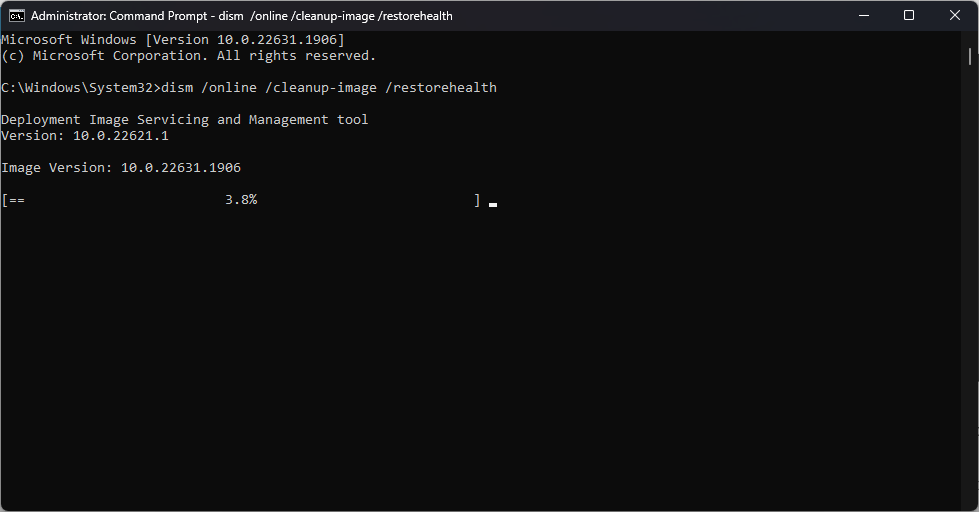
Any issues in the system files will now be checked and fixed. - netsh winsock reset – This operation can assist in fixing network connectivity issues by clearing the Winsock Catalog.
To use it, open the Command Prompt as an administrator, type the following command, and press the Enter key to run it:netsh winsock reset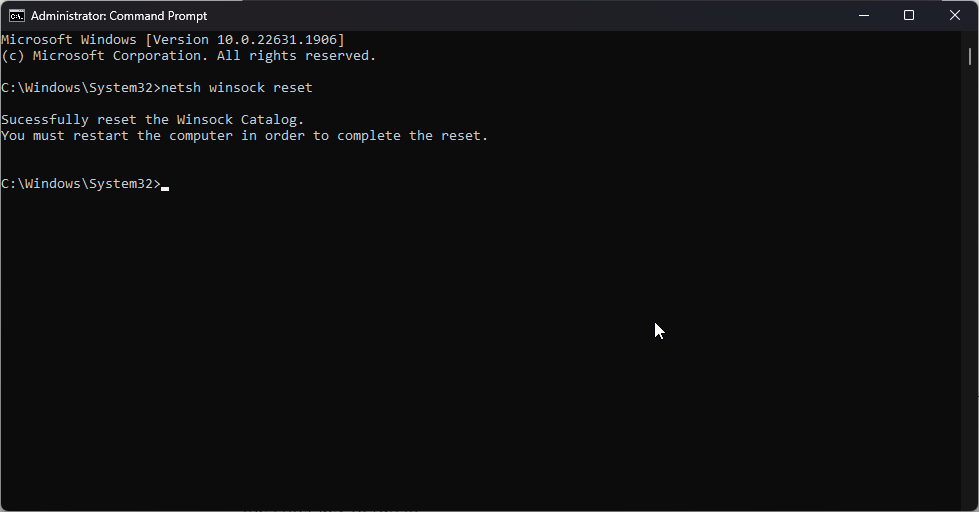
In addition to resetting the Winsock Catalog, this will restart the network adapters of your system.
2. Use a third-party fixer
Thankfully, there is a more straightforward way to carry out the same fixes by using the potent Tweaking program, eliminating the need to remember commands or worry about how they will affect your PC.
This software ensures that you can quickly recover system files, repair file system errors, or reset system preferences.
Here is how you can do so by using Tweaking:
- Download and install the Tweaking Repair software.

- Run the software executable to open the app.

- Click the Go To Step 1 button to start the repair process.
- Perform a proper power reset by following the instructions in the software.

- Go to the Pre-Scan step, and optionally choose if you want to perform it, as it will do a quick scan of 3 sections of the system that might interfere with the repairs.

- Click the Step 3 tab, and click the Check button. This will run a chkdsk command, repairing your disk.

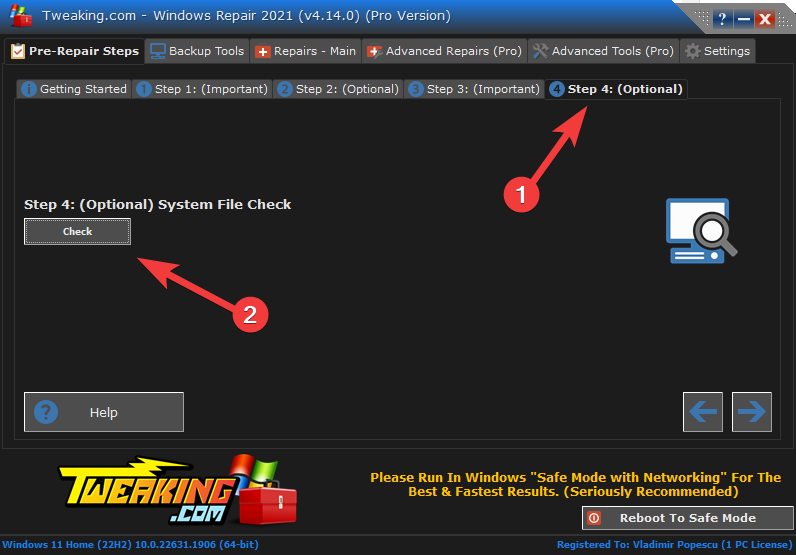
- Click the Step 4 tab, and click the Check button to Start an SFC scan process.
Performing these fixes ensures that you will not face any other problems while using your PC, and its life will be considerably extended, reducing the number of errors you receive.
Don’t hesitate and try out this fantastic tool today! It only takes a few minutes to get it and another minute to use it, and your PC will thank you.

Vladimir Popescu
Verified at:
07/03/2023 10:31
Vladimir started writing articles about Windows because he has a natural interest in this topic, and he has been an avid professional user with more than 15 years of experience. He’s also been writing for WindowsReport.com, MSPoweruser.com and present in various other online publications on matters related to Windows and Windows servers.
Vladimir enjoys practicing Crossfit and making art when he’s not creating top articles with in-depth information.
Leave a Reply