
Are you sick of the obnoxious Windows Nag Icon on your Windows 10 computer? You are not alone!
Users of Windows 10 frequently see the Windows Nag Icon, a tiny white Windows logo on the taskbar. It advises users to update to the most recent operating system version.
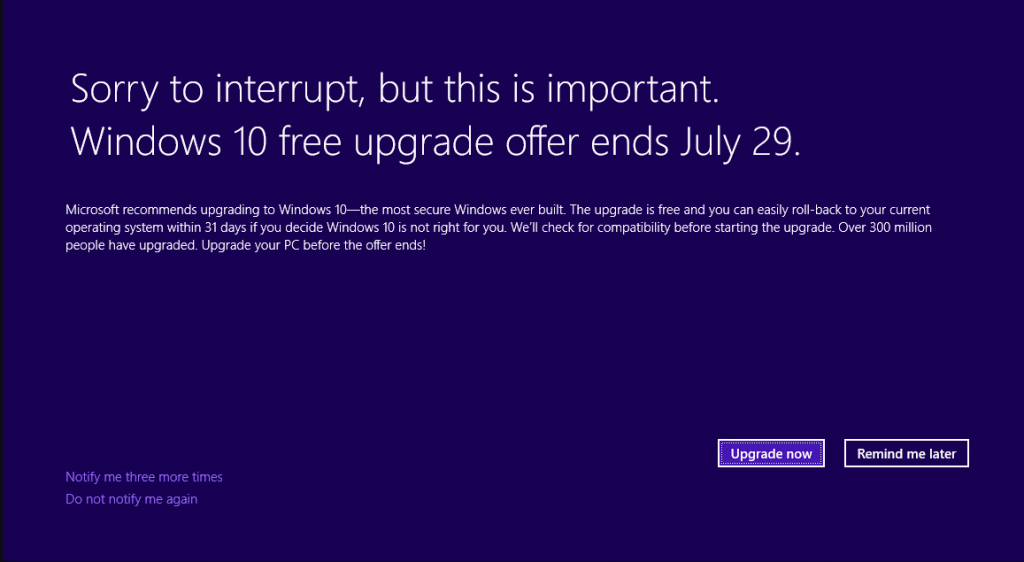
While some users value the reminder, others consider it obtrusive and superfluous. We have instructions for you if you fall into the latter group and wish to remove the Windows Nag Icon and upgrade to Windows 10 without issues.
How do I stop Windows 10 from Updating Nag?
1. Disable the Windows Update notifications
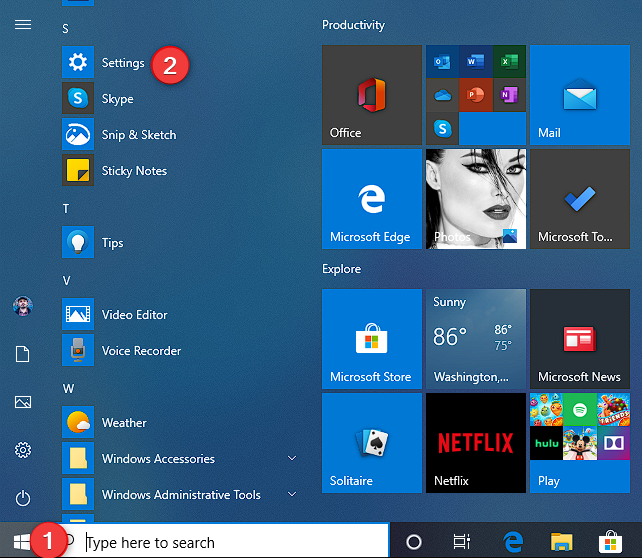
- Click Start and open the Settings app.
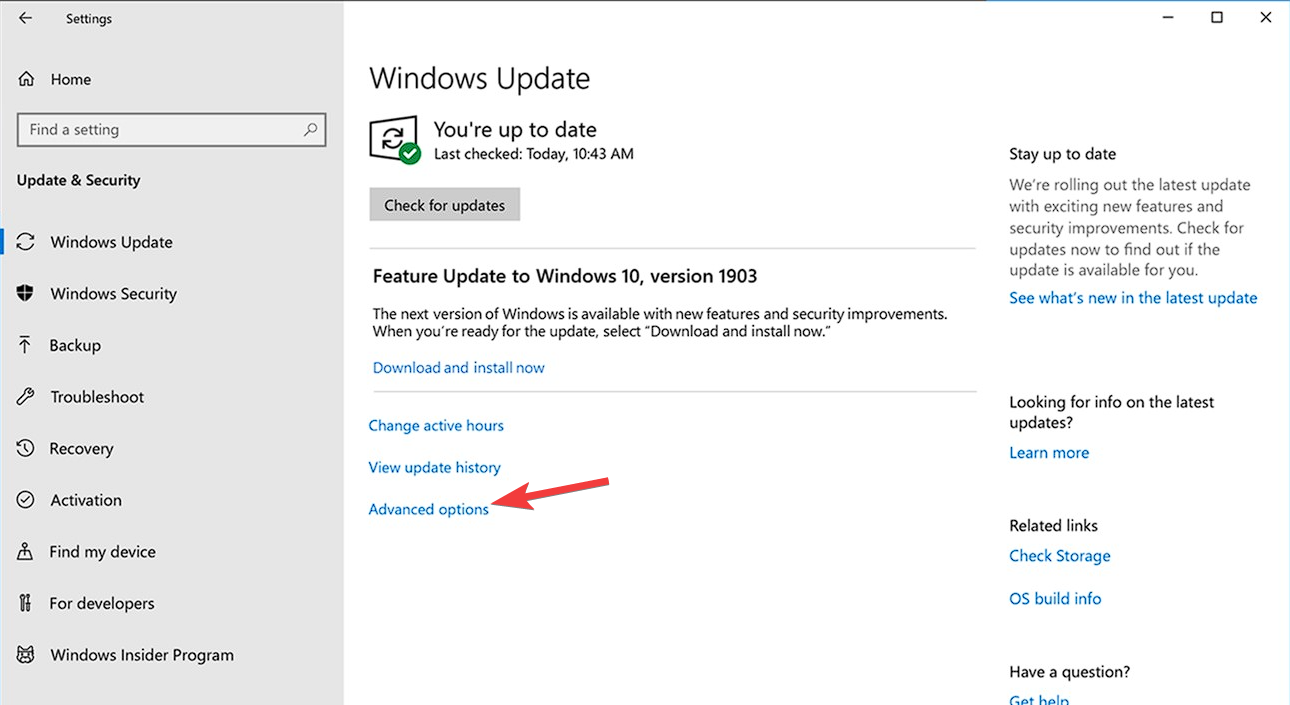
- Choose Update & Security, and click on Windows Update from the left sidebar.
- Click on the Advanced Options link.
- Scroll down the page and click on the Change notification settings option.
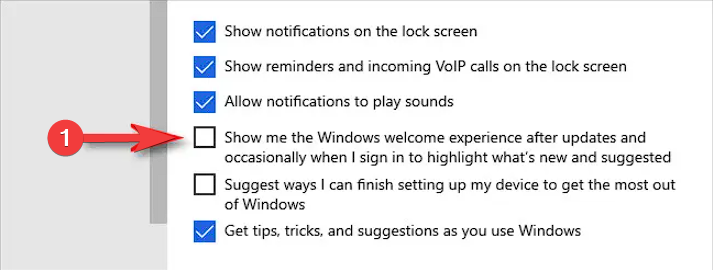
- Toggle the button off for the option Show me the Windows welcome experience.
2. Use a .bat script file
Another efficient method to remove the Windows Nag Icon is to use a.bat script file.
Here are the steps required to do so:
- Open a new Notepad file, and copy-paste the following commands:
REG DELETE "HKCU\Software\Microsoft\Windows\CurrentVersion\GWX" /VA /F
REG DELETE "HKLM\Software\Microsoft\Windows\CurrentVersion\WindowsUpdate\OSUpgrade" /VA /F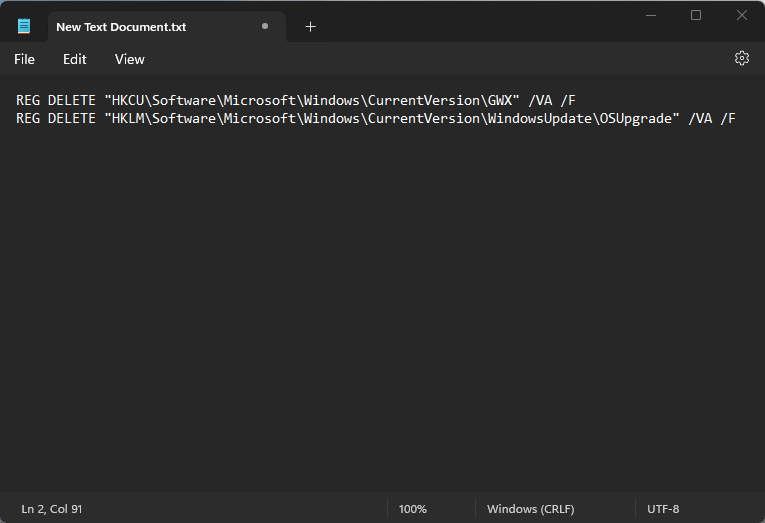
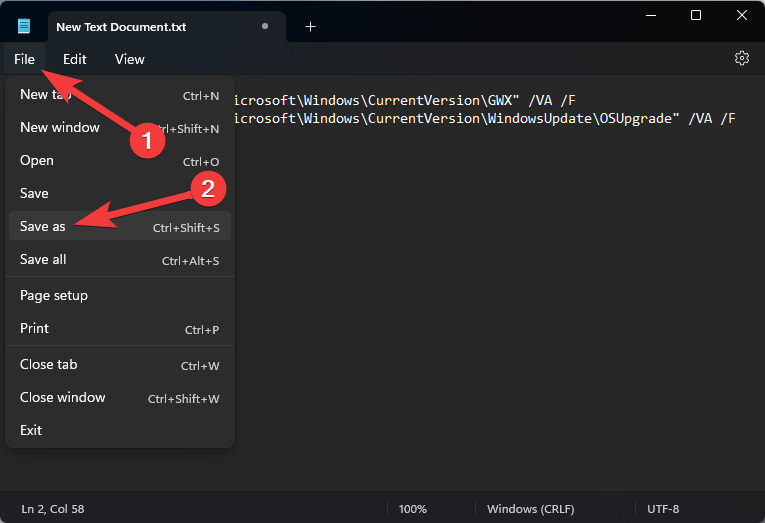
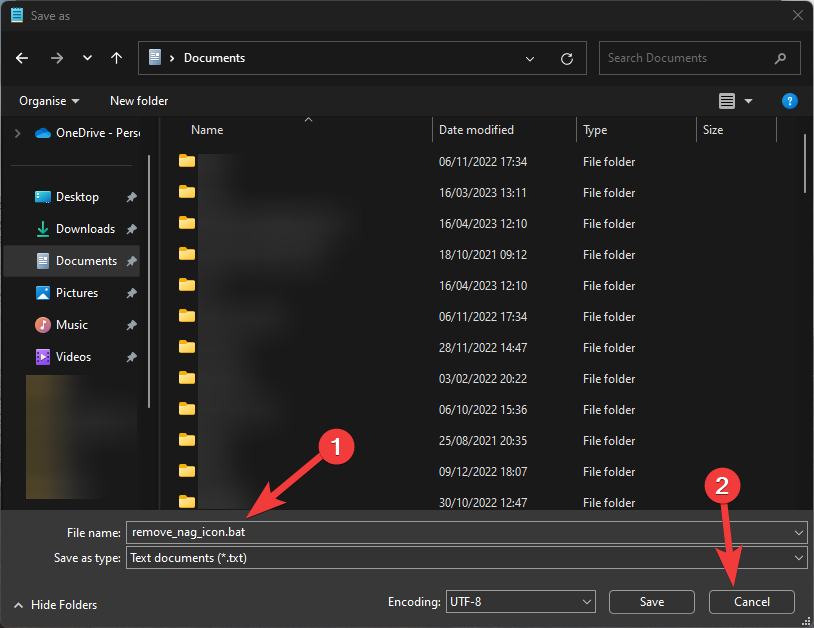
- Click the File menu, choose Save as, and type a name for the file while using a .bat format (e.g., remove_nag_icon.bat).
- Save the file in an easily accessible location.
- Right-click the .bat file and choose Run as administrator to apply the changes.
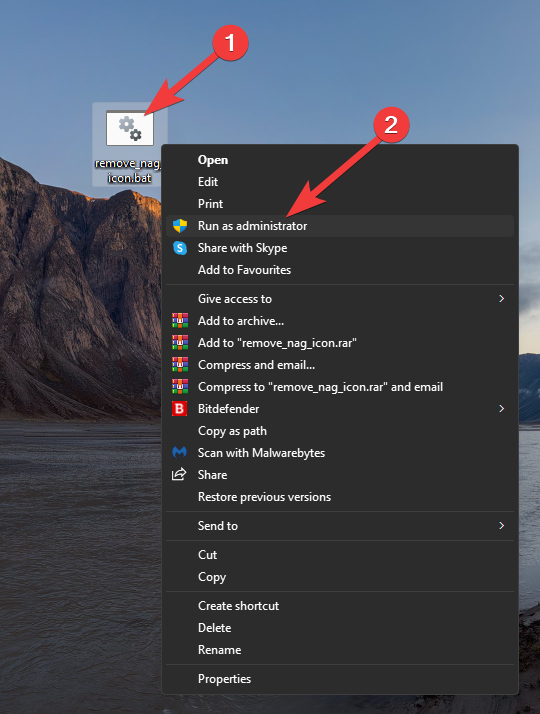
- Restart your PC to finalize the process.
3. Modify the Registry
Note: We recommend creating a backup of your Registry before making any changes. To do so, you can use the powerful Tweaking Repair. Open it, click the Backup Tools tab, and choose Registry Backup.
- Press the Win + R keys, type regedit, and press Enter to open the Registry Editor.
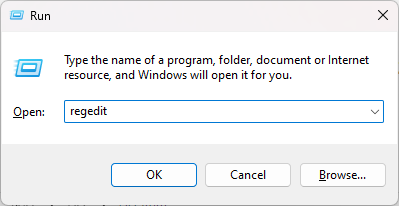
- Navigate to the following key:
HKEY_CURRENT_USER\Software\Microsoft\Windows\CurrentVersion\GWX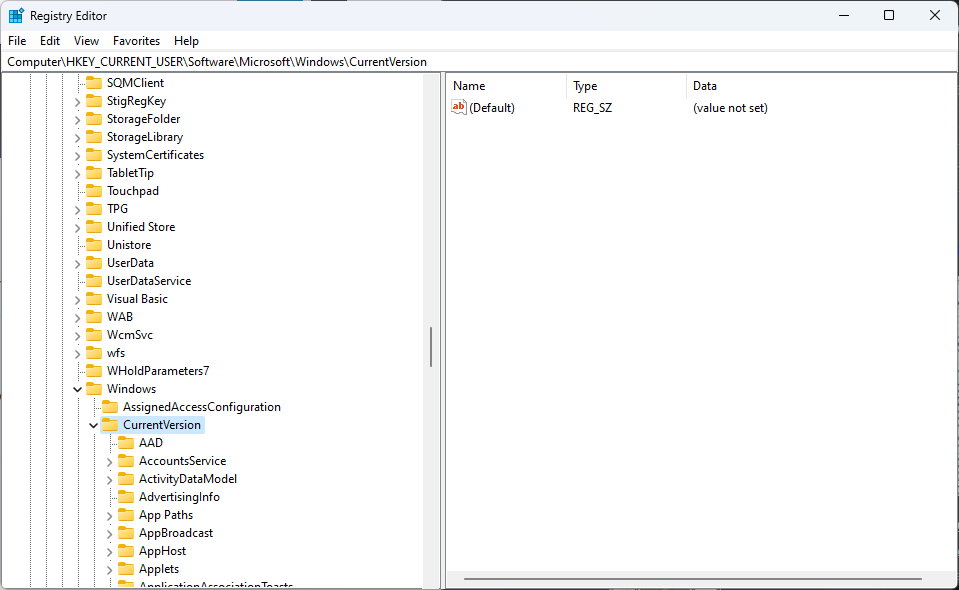
- Right-click the GWX folder and choose Delete.
- Confirm the deletion and close the Registry.
- Restart your computer.
4. Use the Group Policy Editor
You can eliminate the Windows Nag Icon using the Group Policy Editor if you have Windows 10 Pro, Enterprise, or Education editions.
- Press the Win + R key, type gpedit.msc, and press Enter to open the Group Policy Editor.
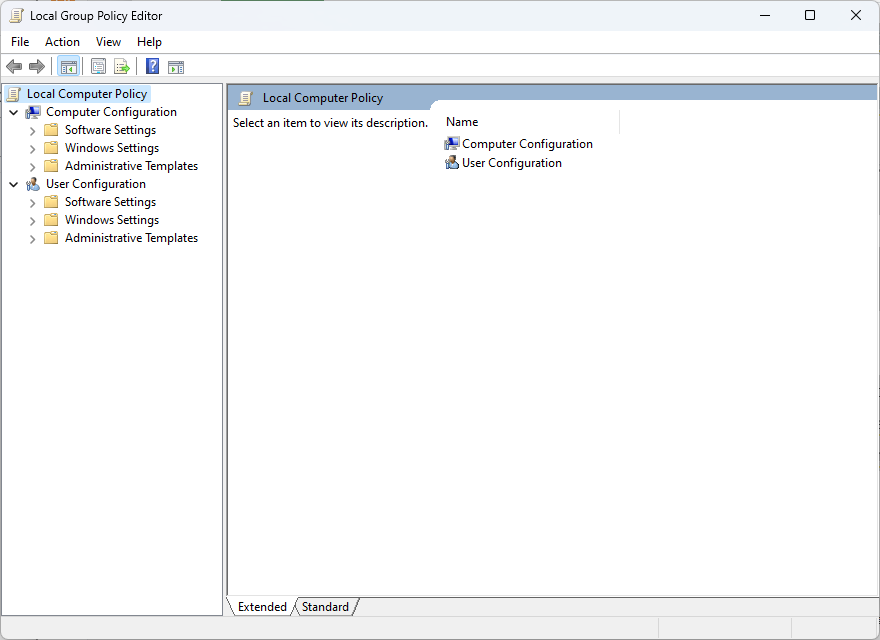
- Navigate to the following path by using the menu:
Computer Configuration > Administrative Templates > Windows Components > Windows Update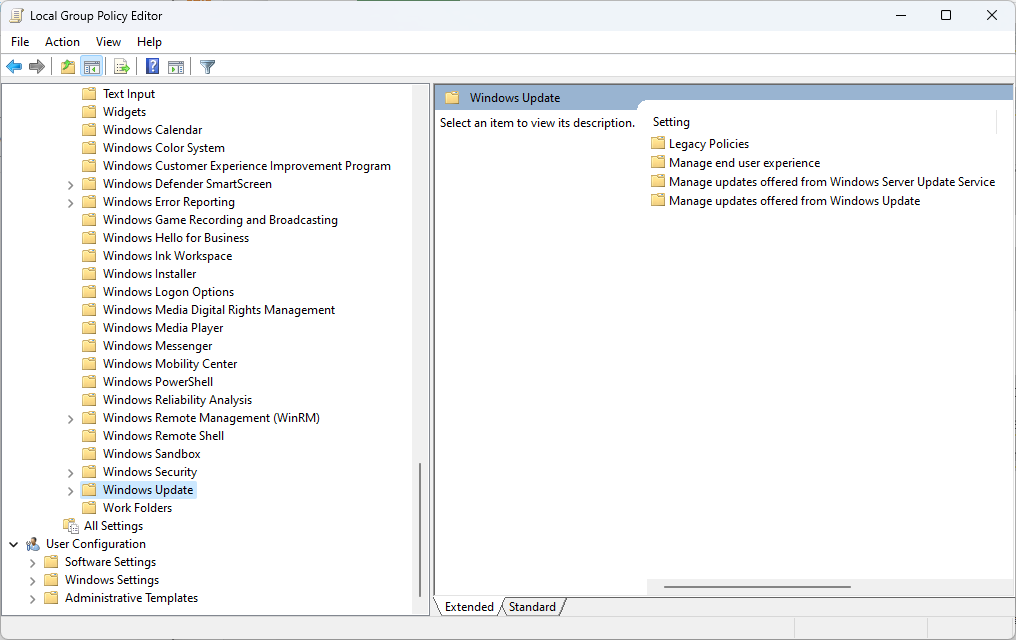
- Search for the Turn off the upgrade to the latest version of Windows through Windows Update option, double-click it, and select Enabled.
- Click Apply and then OK to save the changes.
- Restart your PC.
Using the Group Policy Editor provides a centralized way to manage Windows updates and remove the Nag Icon.
5. Uninstall problematic OS updates
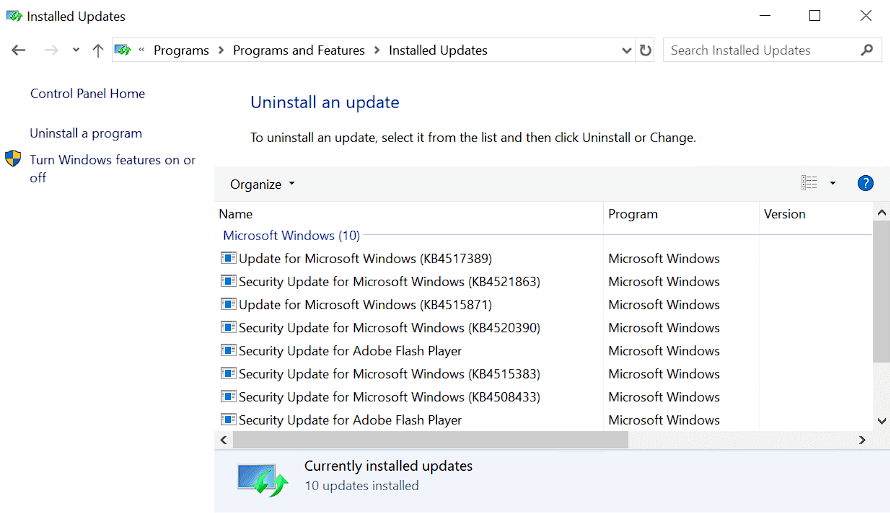
Occasionally, certain updates can make the Windows Nag Icon display repeatedly. In some circumstances, the problem can be fixed by removing the updates.
Before diving into the actual steps, we need to identify which Windows 10 updates we can uninstall to resolve this issue:
KB3035583
Microsoft provided this update to advertise the free upgrade to Windows 10. On Windows 7 and 8.1 devices, it installed the Get Windows 10 program, which then showed the Windows Nag Icon. This update can be uninstalled to eliminate the nag icon and stop additional upgrade alerts.
KB2952664
The Windows 10 upgrade was made easier for PCs thanks to this update, which also introduced compatibility diagnostics. Some customers claimed that deleting this update fixed the Windows Nag Icon problem.
KB2976978
This update was made available with KB2952664 as a part of Microsoft’s push to get Windows 7 and 8.1 customers to upgrade to Windows 10. This update can be uninstalled to get rid of the nag icon.
KB2990214
For a better Windows 10 upgrade experience, this update enhanced the functionality of Windows 7 and 8.1 PCs. The Windows Nag Icon is reportedly prevented from appearing by removing this update.
KB3150513
After Windows 10 was released, a compatibility update was included to allow Windows 7 and 8.1 users to update to the most recent version. Some customers could fix the nag icon problem by uninstalling this update.
Because these updates are linked to the Get Windows 10 campaign and were created to persuade people to upgrade, removing them can be beneficial. The triggers that cause the nag icon to appear are eliminated by uninstalling them.
Removing these updates won’t affect your system’s overall operation or security, but it will stop future Windows 10 upgrade alerts. It’s crucial to remember that these updates might have other advantages.
Use the steps below to reach your PC’s update history list and remove the updates mentioned above:
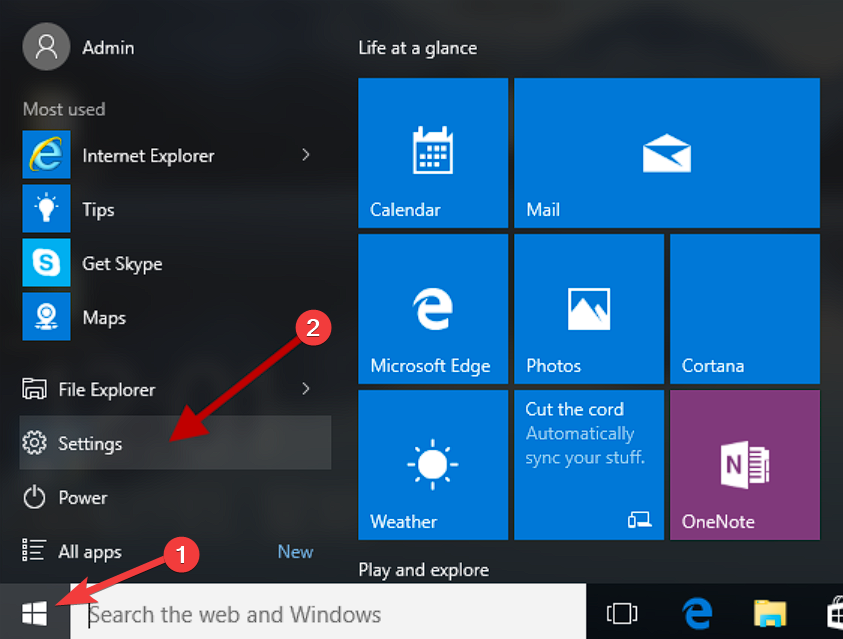
- Open the Start menu and click on Settings.
- Navigate to Update & Security, and click Windows Update.
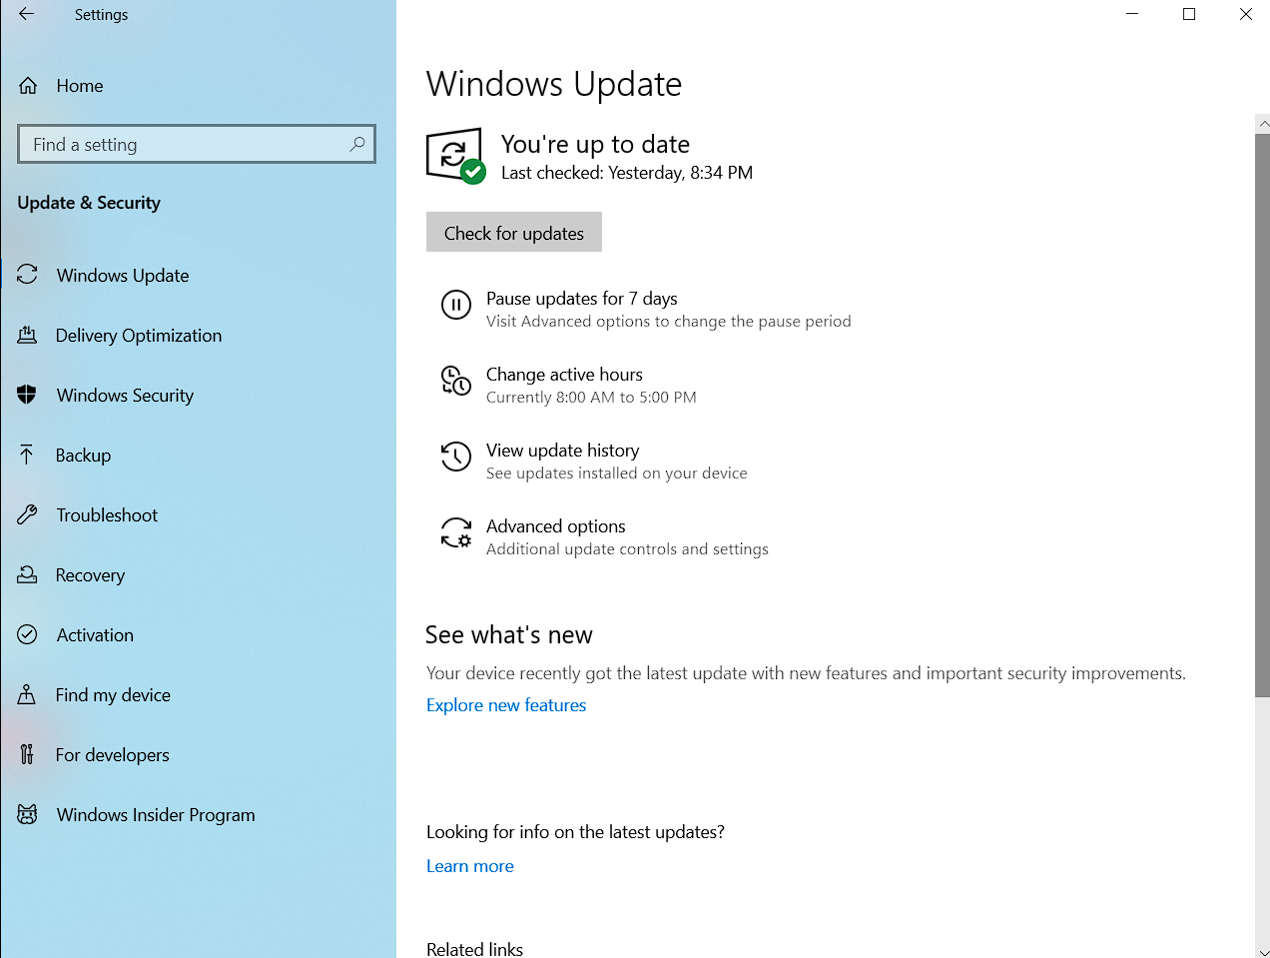
- Select the View update history option, and click on Uninstall updates.
- Find the problematic update inside the list, right-click it, and choose Uninstall.
- Restart your computer.
Note: Always create a system restore point or back up your most important information before uninstalling any update because doing so can have unintended repercussions.
6. Use a third-party tool
The Windows Nag Icon can be eliminated using some third-party solutions if the techniques above fail or you prefer a more automatic solution.
Tools like I Don’t Want Windows 10 and Never10, created especially for this use, can help you with this task. Visit their official websites, download the necessary software, and adhere to the instructions to get rid of the Nag Icon.
It’s crucial to remember that using third-party programs can expose you to security threats such as viruses, so make sure you only download them from reliable sites.
In conclusion, Windows 10 users may find the Windows Nag Icon intrusive and annoying. But there are several techniques you may use to get rid of it and take back control of your desktop experience.
You may successfully remove the nag icon and stop it from returning by carefully following the detailed methods offered in this article.

Vladimir Popescu
Verified at:
07/03/2023 10:31
Vladimir started writing articles about Windows because he has a natural interest in this topic, and he has been an avid professional user with more than 15 years of experience. He’s also been writing for WindowsReport.com, MSPoweruser.com and present in various other online publications on matters related to Windows and Windows servers.
Vladimir enjoys practicing Crossfit and making art when he’s not creating top articles with in-depth information.
Leave a Reply