The Windows Installer, commonly known as MSI (Microsoft Installer), is critical in installing, maintaining, and removing software from your operating system.
When this critical component encounters issues, it can affect software installation and updates, which makes the device almost unusable.
That being said, this guide will walk you through several practical methods that can repair the Windows Installer.
Explore the methods below to regain control over your software installation and updates.
How can I repair the MSI installer?
1. Use the Windows troubleshooter
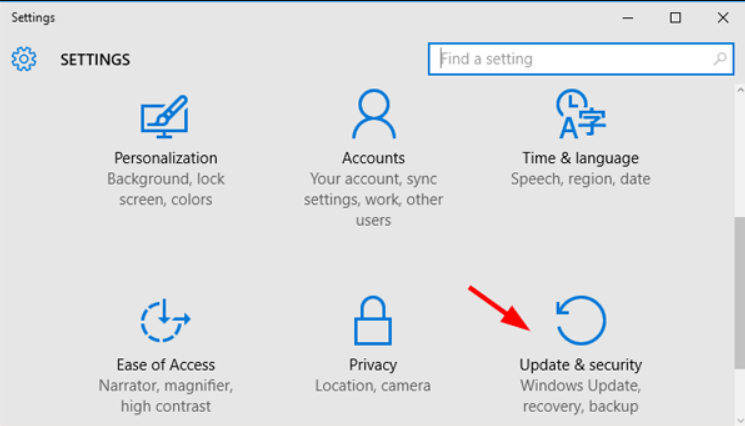
- Press the Win + I key combination to open Settings.
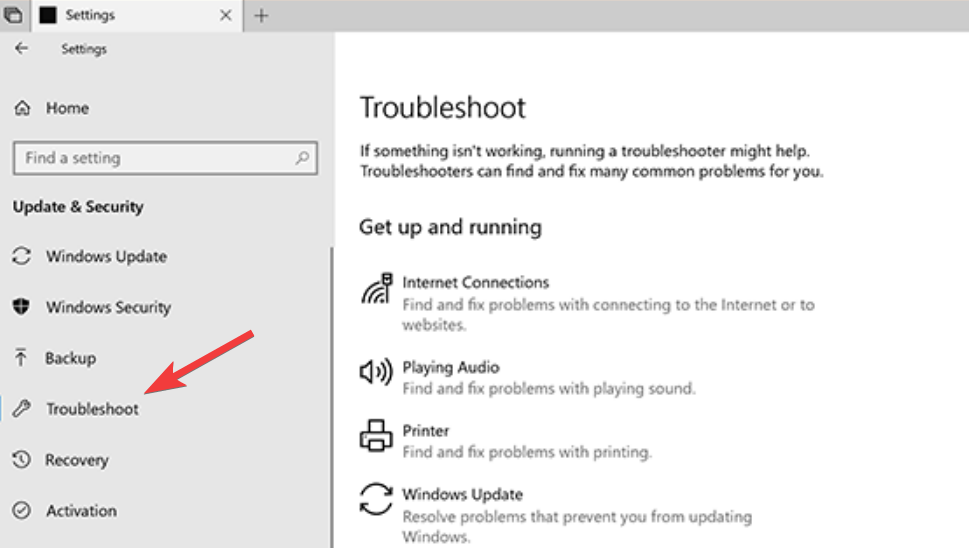
- Open Updates & Security, and click on Troubleshoot.
- Under the Get up and Running section, click on Windows Installer, and then choose Run the Troubleshooter.
- Follow the on-screen instructions to complete the process.
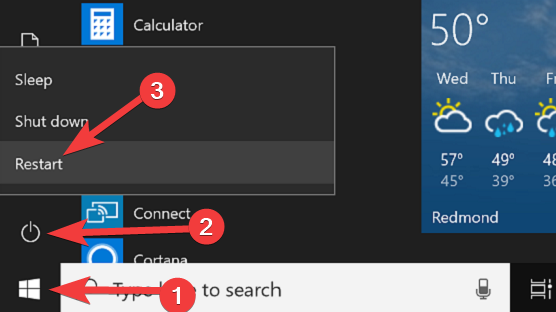
- Restart your computer and check to see if the issue is resolved.
2. Check the Windows Installer Service
- Press the Win + R key combination, type the following command, and press Enter:
services.msc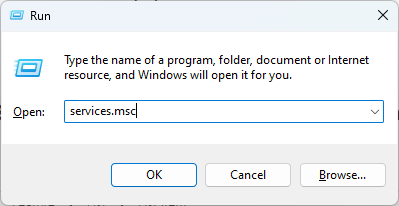
- Scroll down and find the Windows Installer service inside the list.
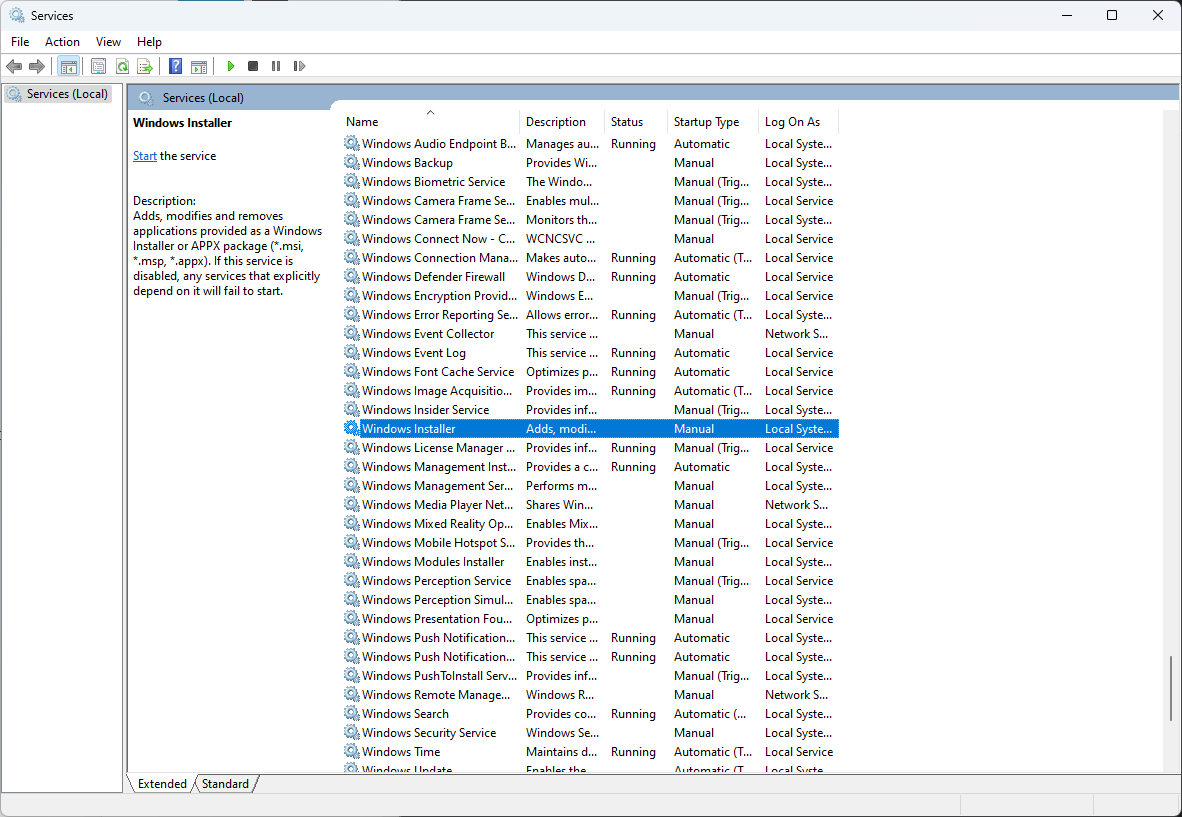
- Double-click the entry to open its properties.
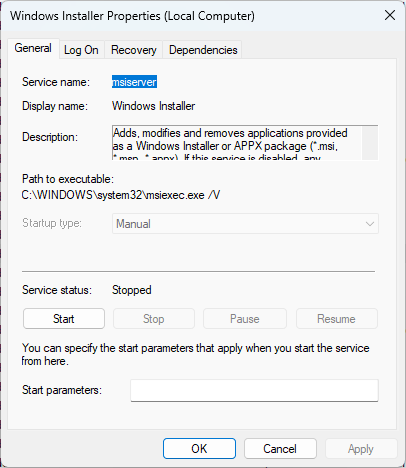
- In the Startup Type dropdown, choose Automatic.
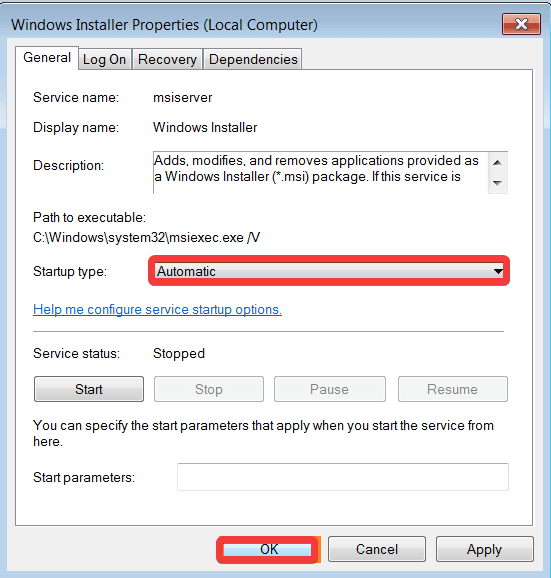
- Click Apply and then OK to save the changes.
- Restart your PC for the changes to take effect.
3. Use the Command Prompt with Administrator rights
- Press the Win + X keys and select Windows Terminal (Admin) or Command Prompt (Admin) from the menu.
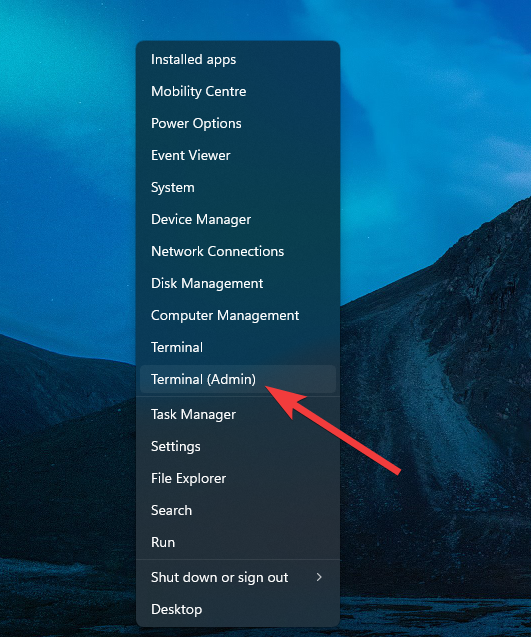
- Type the following command and press Enter to run it:
msiexec /unregister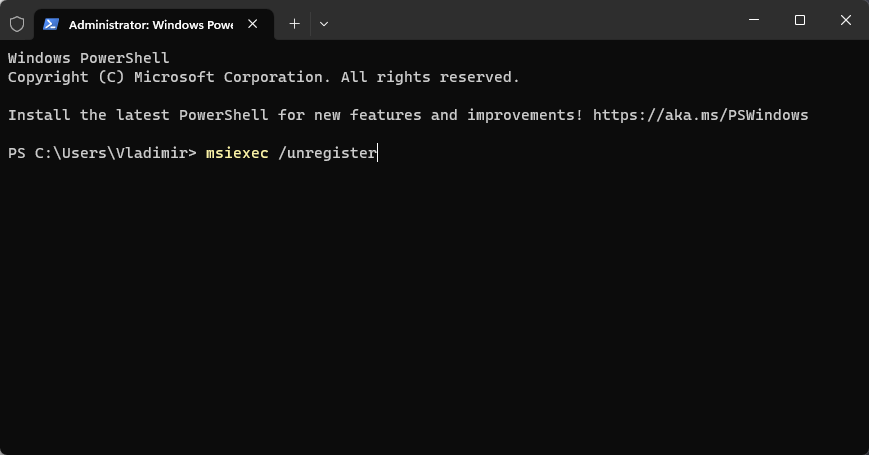
- Then, type the following command and press Enter to run it:
msiexec /regserver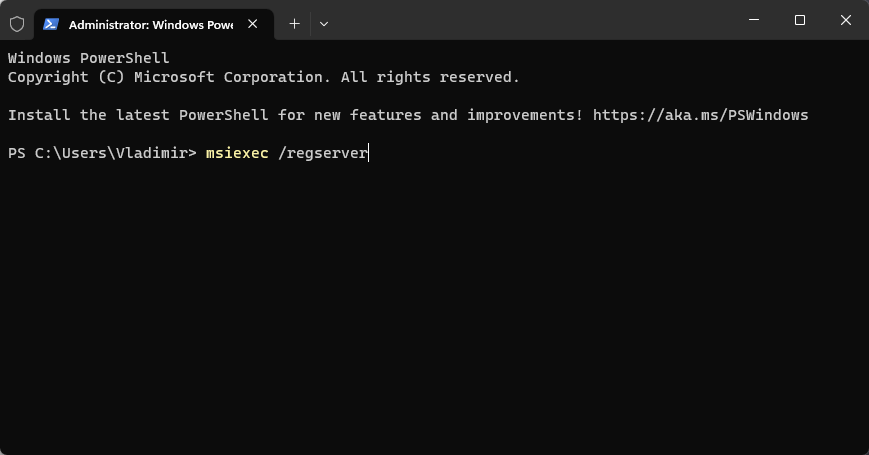
- Close the Command Prompt and restart your PC.
4. Reinstall the Windows MSI
- Download the appropriate version of Windows Installer from the Microsoft website.
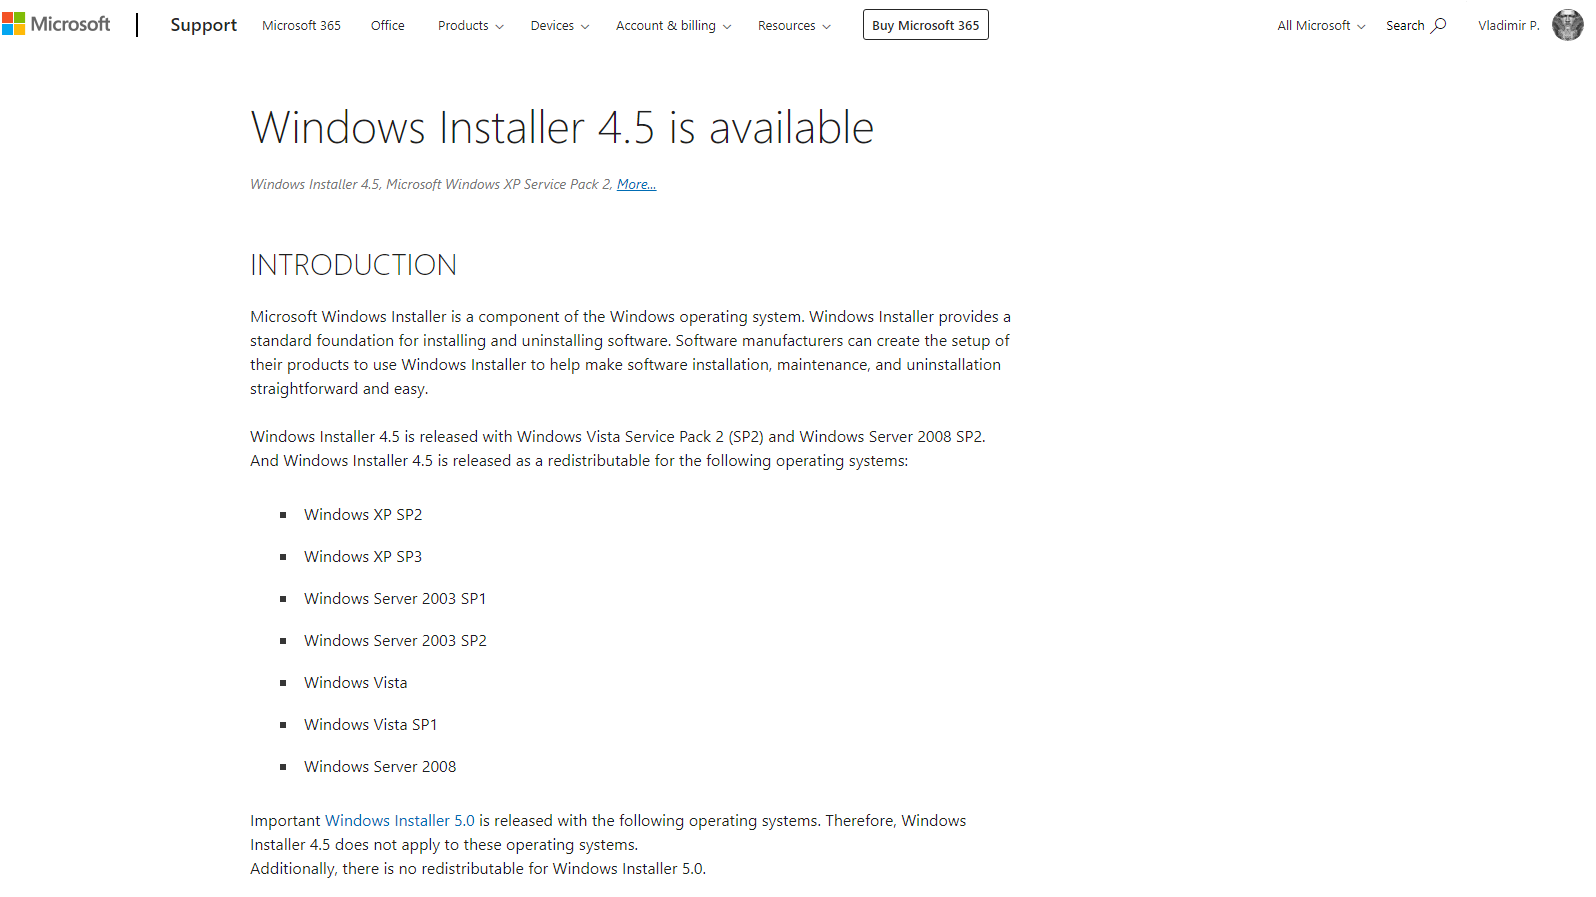
- Run the installer on your PC and follow the on-screen instructions to install it.
- Ensure that you’re choosing the correct version for your operating system.
- Restart your computer to complete the installation.
The methods described above should be enough to repair the Windows Installer on your system and return to normal usage. If you continue to experience problems with MSI or encounter other errors, you may need to consider more advanced troubleshooting or ask for help from Microsoft Support or a technician.
Shane Croft
Verified at:
07/07/2023 07:48
Shane is the former creator of most Tweaking.com tools.He’s been addicted to Windows computers since 1995, but still craves to learn Linux and Apple as well. Highly experienced in Visual Basic 6 since 2000, Shane Croft moved to .NET and developed several other tools such as CleanMem, PortForwarding, Simple Ping and more. Find more about him at www.pcwintech.com/about
Leave a Reply