
Any seasoned user understands the importance of frequently backing up your computer’s registry.
The registry stores all of your operating system’s and installed apps’ critical settings and preferences, and deleting or altering this information can have severe consequences for your computer’s stability and performance.
In this video, we will lead you through backing up the registry on Windows 11 while also covering the methods to restore the registry on this OS.
Where is the registry stored in Windows 11?
The registry in Windows 11 is kept as a collection of files in the following path: C:\Windows\System32\Config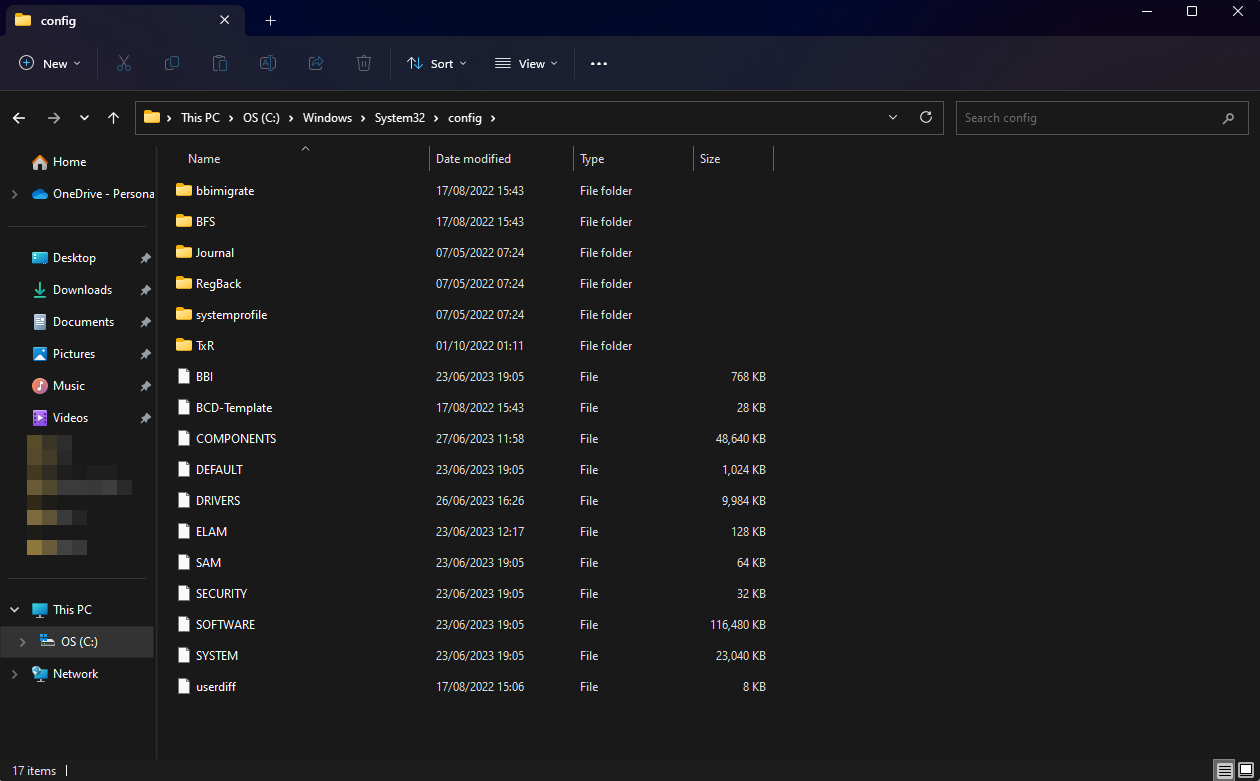
These files are known as the registry hive files and are named DEFAULT, SAM, SECURITY, SOFTWARE, and SYSTEM.
Each of these files holds a distinct part of the registry data, such as user settings, system configurations, and information about installed software.
The operating system encrypts the registry hive files and cannot be directly edited. To examine and alter registry data, you must instead use a tool such as the Registry Editor or a command-line utility.
When you modify the registry, the operating system updates the corresponding hive file(s) to reflect the changes.
What is the best way to back up Windows 11?
1. Use the Registry Editor
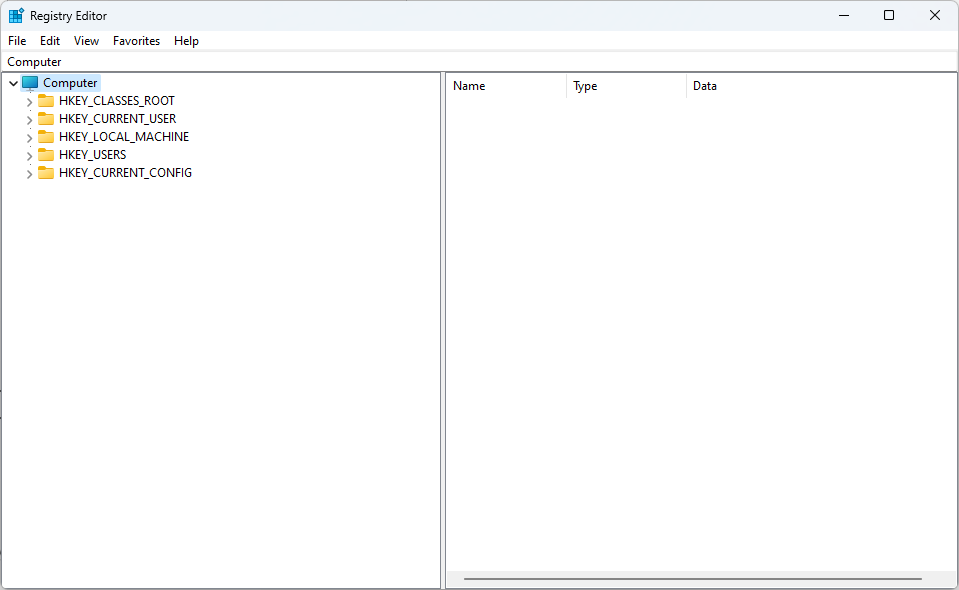
1.1 Launch Registry Editor
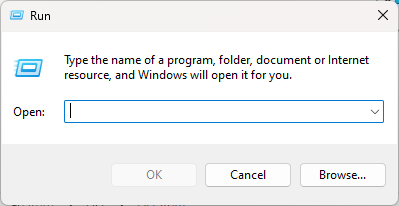
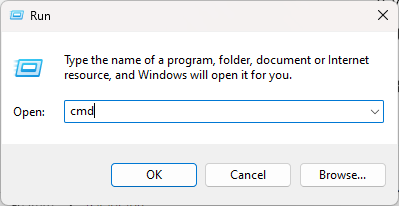
- Press the Win + R keys to open the Run dialog box.
- Enter regedit and press Enter.
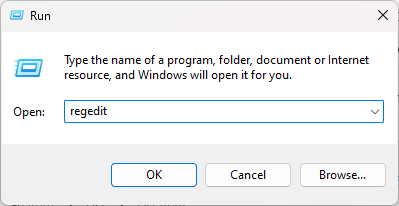
- The Registry Editor will be launched.
1.2. Determine which Registry Keys you wish to backup
After you launch the Registry Editor, you must select the registry keys you want to back up. To do this, navigate to the key you want to back up in the Registry Editor’s left-hand-side window.
For example, if you want to back up the entire registry, select the Computer key at the top of the list.

1.3. Export the registry keys you’ve chosen
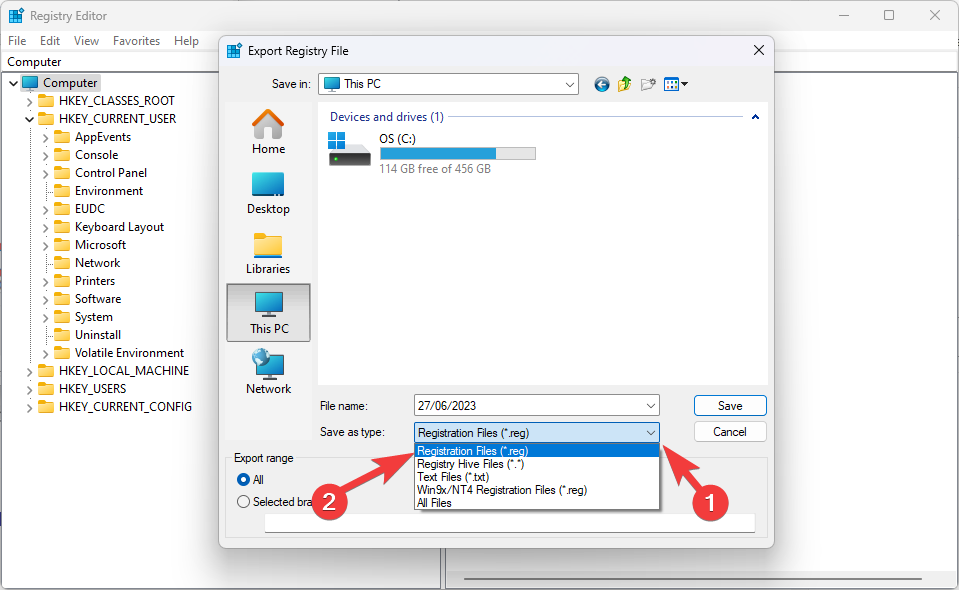
You can back up your registry keys once you’ve decided which ones to export. Right-click on the key/keys you want to export in the left-hand pane and choose Export from the context menu.
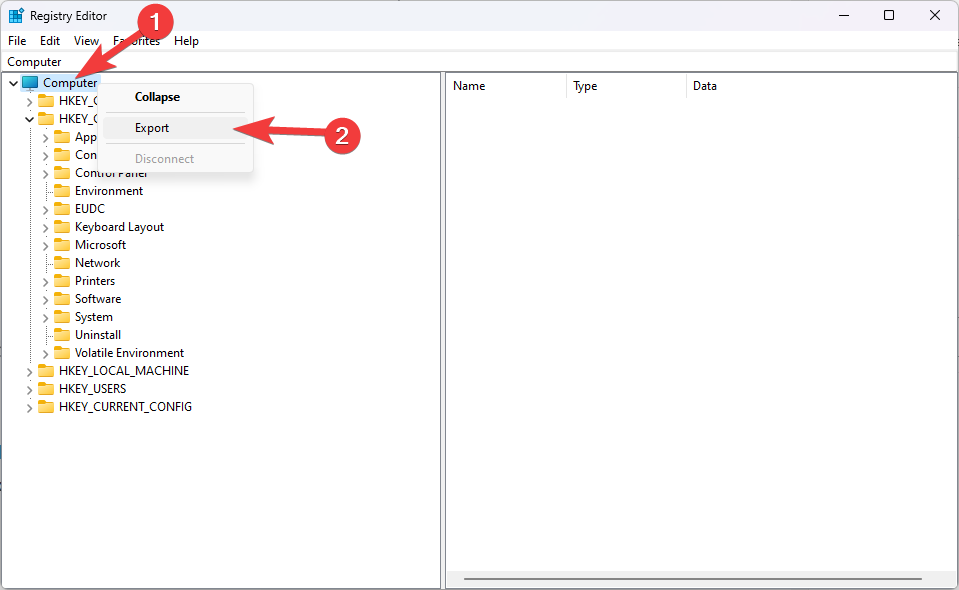
The dialog box Export Registry File will appear.
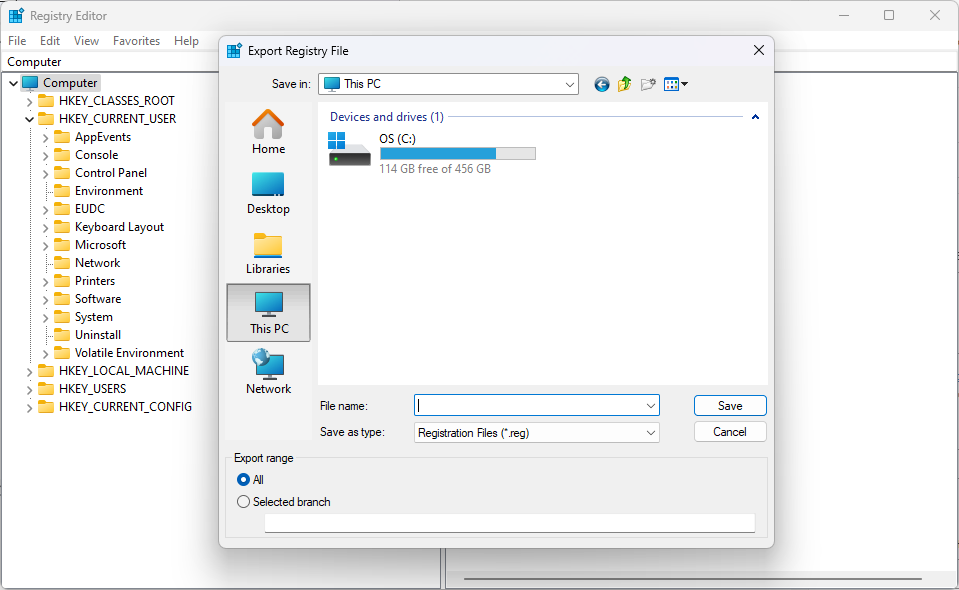
1.4. Select a backup name and location
Choosing a place for your backup and a decent backup name guarantees that you can always find your backup file, and the name will help you identify it specifically. We recommend you use the current date in the name for the best results.
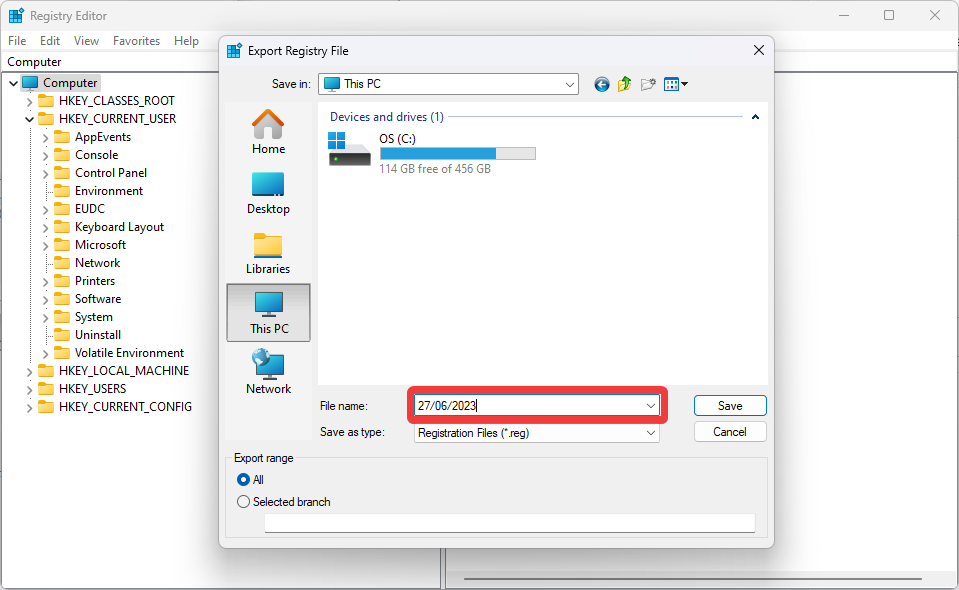
After naming the file in the Export Registry File dialog, select the .reg file extension and click Save.
1.5. Verify that the backup file was successfully produced
It is critical to ensure that the backup file is operational. To do so, right-click the backup file and open it in a text editor such as Notepad. Then you can verify to see if the registry keys are accurately shown.
If everything appears in order, you can proceed to the additional registry files you might want to back up.
2. Use Tweaking Repair

Utilizing specialized software to deal with registry duties is always more efficient, and using Tweaking to build a backup for your registry is no exception.
This software enables any user, no matter their proficiency in the field, to manage, repair, and recover data.
- Download Tweaking.

- Open the Backup Tools tab, and press the Backup button under the Registry Backup section.
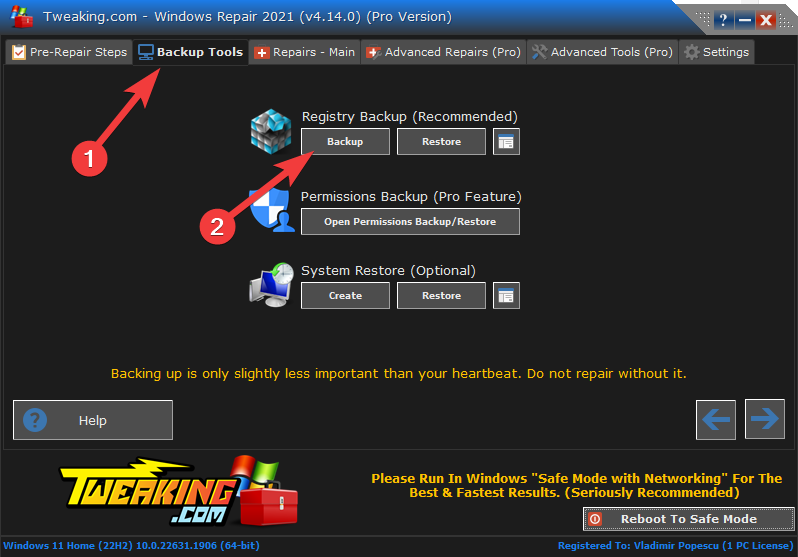
- This will prompt Tweaking to start the backup process.
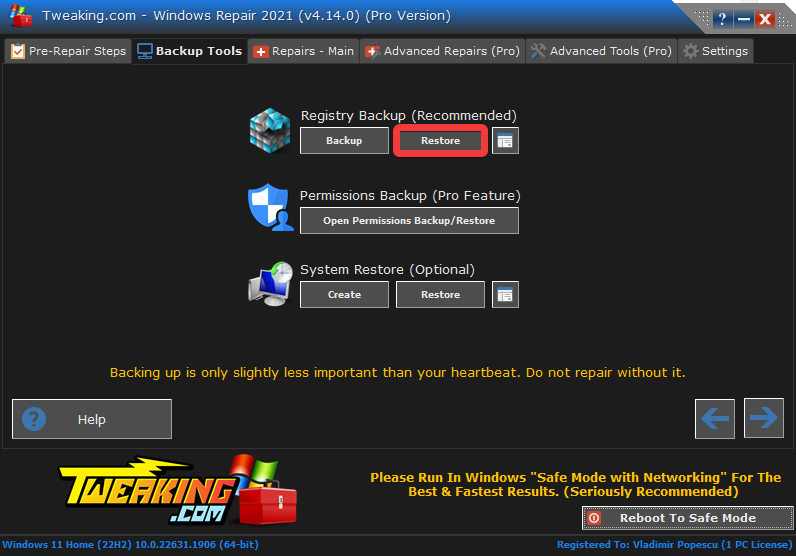
- To restore a previously-created backup, click the Restore button from the same section.
3. Use the Command line
Backing up your registry with the Command Line or with PowerShell requires more proficiency compared with the previously-mentioned solutions, so please take that into account.
3.1. Open the Command Prompt
- Press the Win + R key combination to open Run.
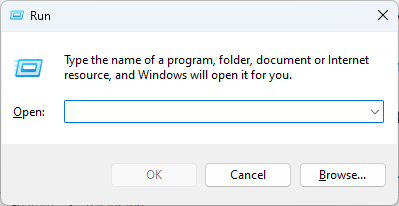
- Type cmd in the Run dialog and press Enter to run the app.
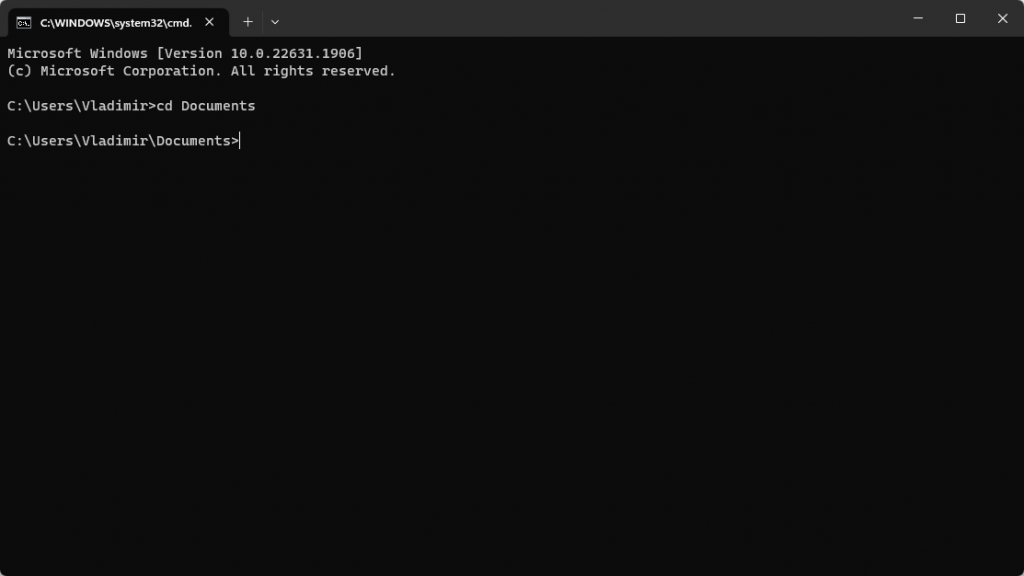
3.2. Select the storage location
Navigate to the location where you wish to save the backup file using the cd command.
For example, if you want to save the backup file in the Documents folder, type cd Documents and click Enter.
3.3. Backup your registry
Inside the Command Prompt, type the following command and run it: reg export
Note: Add the path of the registry key you want to backup, and add the backup file name, including the .reg extension.
As an example:
HKEY_CURRENT_USER/Software/Microsoft/Windows/CurrentVersion/Run backup.reg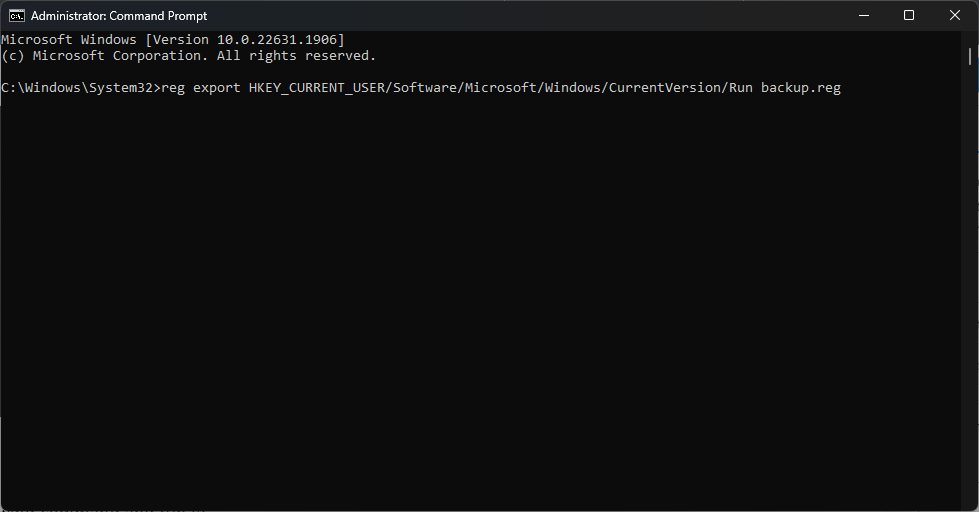
As you can see, there are ways to back up your Windows 11 PC registry files successfully, and if you’re unsure about following the complex steps, we recommend that you use Tweaking to sort out this issue.

Vladimir Popescu
Verified at:
07/03/2023 10:31
Vladimir started writing articles about Windows because he has a natural interest in this topic, and he has been an avid professional user with more than 15 years of experience. He’s also been writing for WindowsReport.com, MSPoweruser.com and present in various other online publications on matters related to Windows and Windows servers.
Vladimir enjoys practicing Crossfit and making art when he’s not creating top articles with in-depth information.
Leave a Reply