
Are you asking yourself what repair tool to use for your Windows 10? If you’re facing issues like slow performance, slow boot-up, erratic behavior, and frequent errors on your Windows 10, you might be wondering which tool to use to repair your OS.
Fortunately, Windows 10 has several built-in tools to help you fix these issues. In this post, I’ll provide detailed information about these tools. While many paid tools can do this job quicker and more efficiently, my focus will mainly be on the tools that Windows 10 provides.
Applying these tools might take some time, but it’s worth it if you want to ensure the optimal performance of your OS and save some money.
Which Windows repair method should I start with?
As you know, an operating system (OS) is the foundation of every computer. If your OS corrupts or behaves abnormally, you cannot utilize your computer for regular work, gaming, or other entertainment.
Regardless of your OS, it may encounter unexpected issues or errors. Luckily, Windows 10 provides several built-in tools that can be utilized to perform successful repairs. These tools include;
- Windows Troubleshooter
- Reset Network
- SFC
- CHKDSK
- Windows Startup Repair
- DISM
Of course, there are also other supplementary methods available.
In the following article, I will present you with the best methods to remove problems from your Windows 10 effectively.
1. Update Windows 10
I always make sure my Windows 10 is up to date. Within the validity period of each operating system, Microsoft regularly releases updates for it. Perhaps the problem lies precisely in the fact that your OS is not updated.
Usually, when a new Windows 10 update is released, the system can automatically detect it and download and install it on your computer. Sometimes, the system will not download updates if this process is turned off accidentally or intentionally by some malicious software. In any case, first, check if Windows 10 is updated as follows:
1. Click on the search bar and type update.
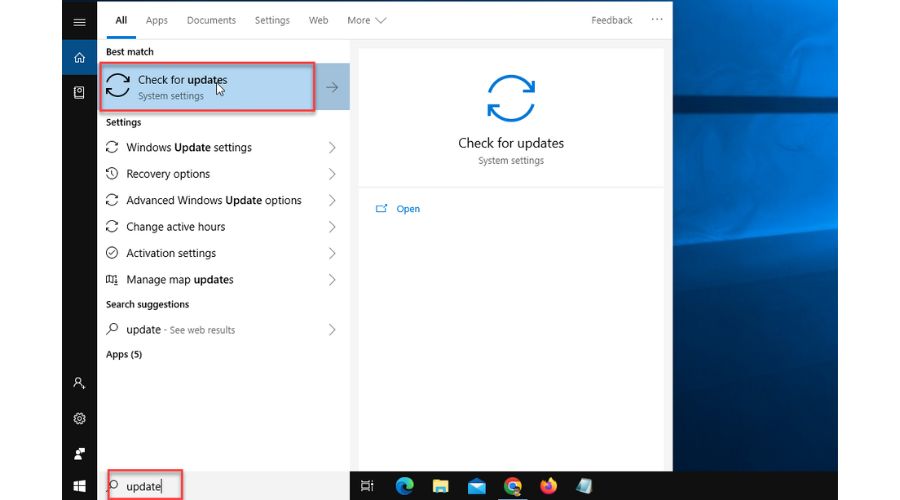
2. Click on the Check for updates in the search result.
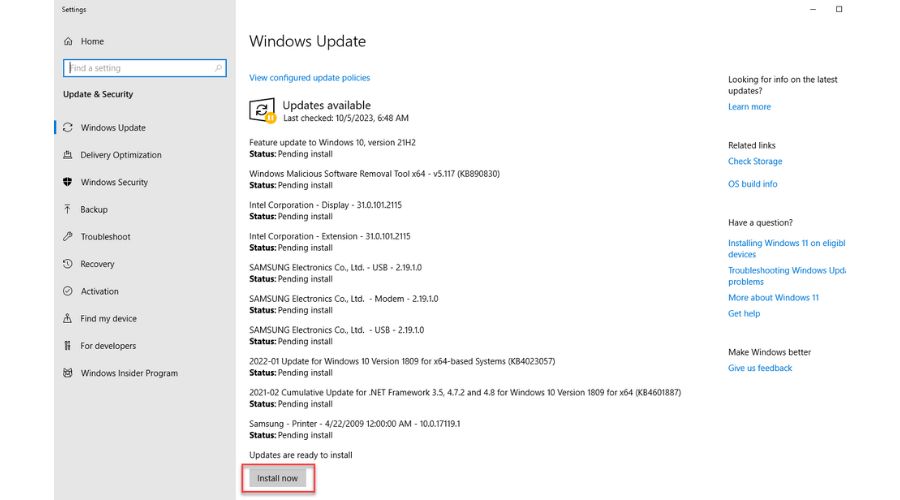
3. If your Windows 10 is not up to date, click on the Install Now button.
If the update process is disabled for some reason, check its status as follows:
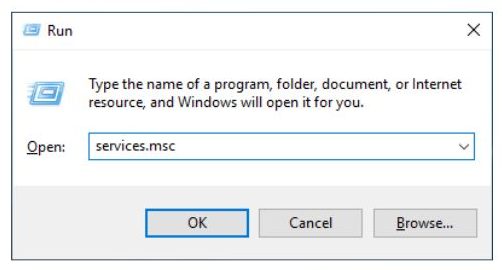
1. Press the Windows + R keys simultaneously on the keyboard to show the Run dialog box.
2. Type; ‘services.msc‘ in the text box and press Enter.
3. Scroll down to find the Windows Update service and right-click to select Properties.
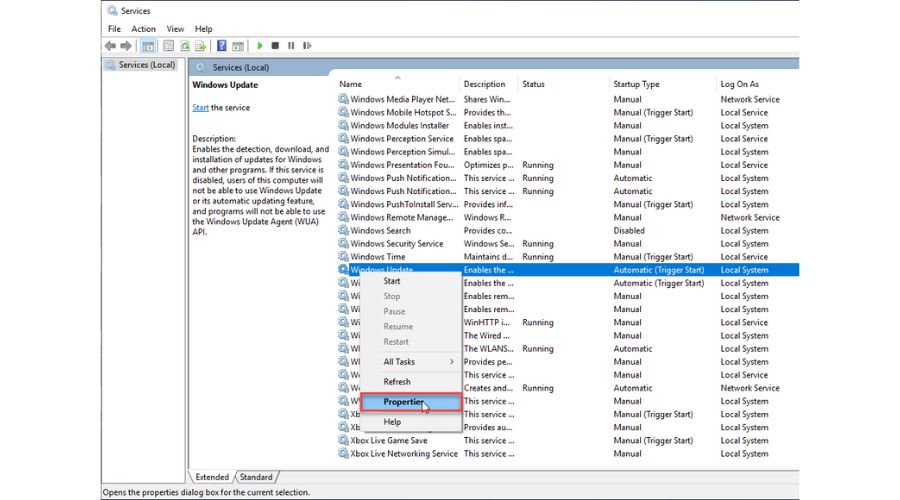
4. If service is stopped, click on Start. Select from the drop-down menu to choose Automatic.
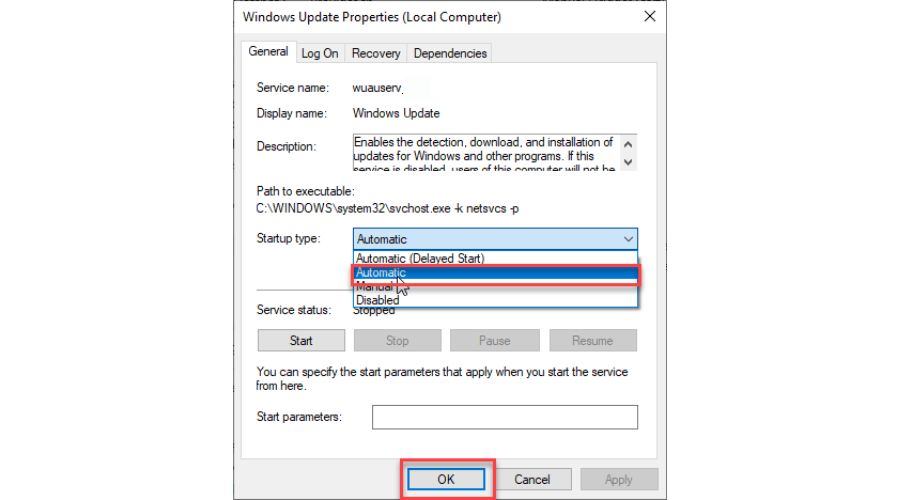
5. Click OK to confirm changes and check if the Windows 10 update is working again.
2. Use Windows Troubleshooters
Windows Troubleshooters have been designed to diagnose and promptly fix various computer issues. These troubleshooters aim to identify specific components and functions on your computer, including network connection problems, audio and video issues, windows updates, and peripherals. In short, they can easily help you quickly fix various computer problems.
I’ll show you an example if you have a problem playing sound on your computer:
1. Click on the search bar and type; troubleshoot.
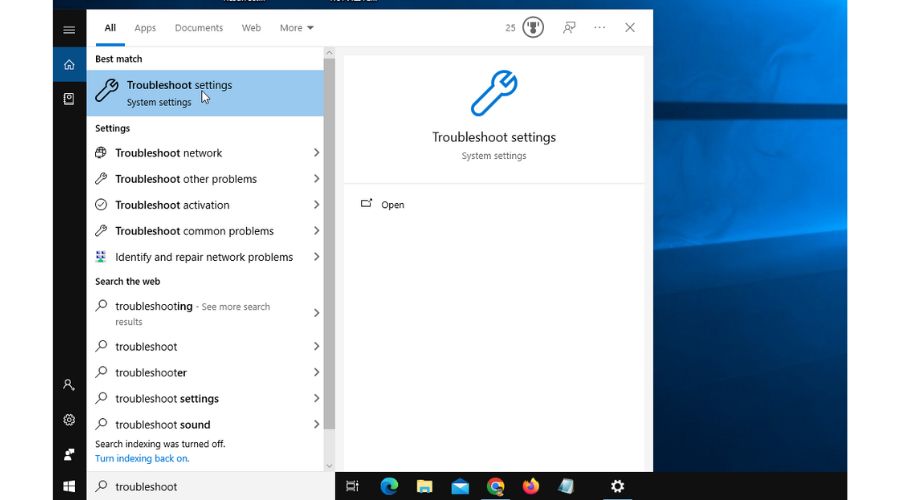
2. Click on the Troubleshoot settings in the search result.
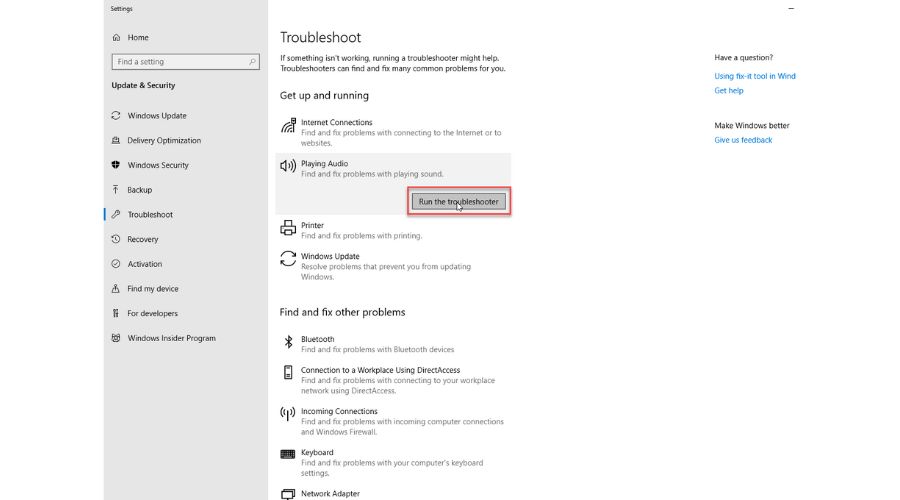
3. Select Playing Audio and Run the troubleshooter.
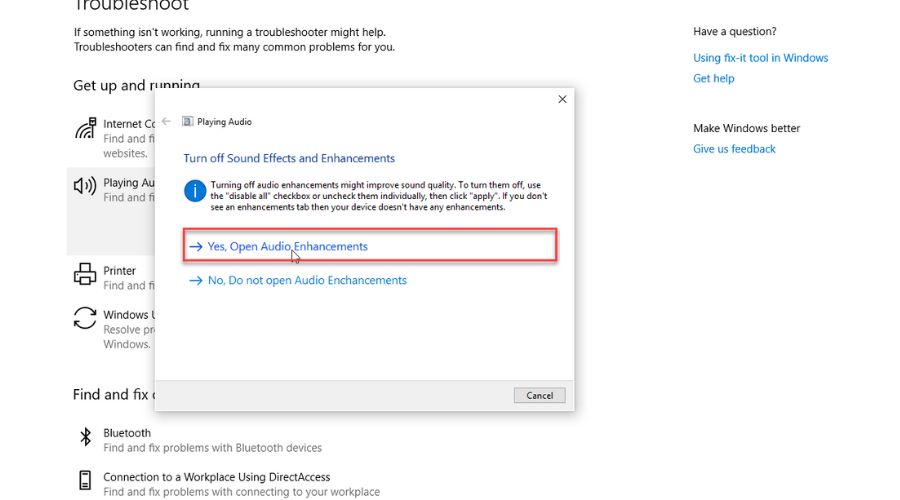
4. The troubleshooter will examine the problem and suggest a specific solution. Based on the recommendation, I will turn off the audio enhancement because I usually don’t use it.
5. Speaker Properties will automatically open and select Off for Spatial sound.
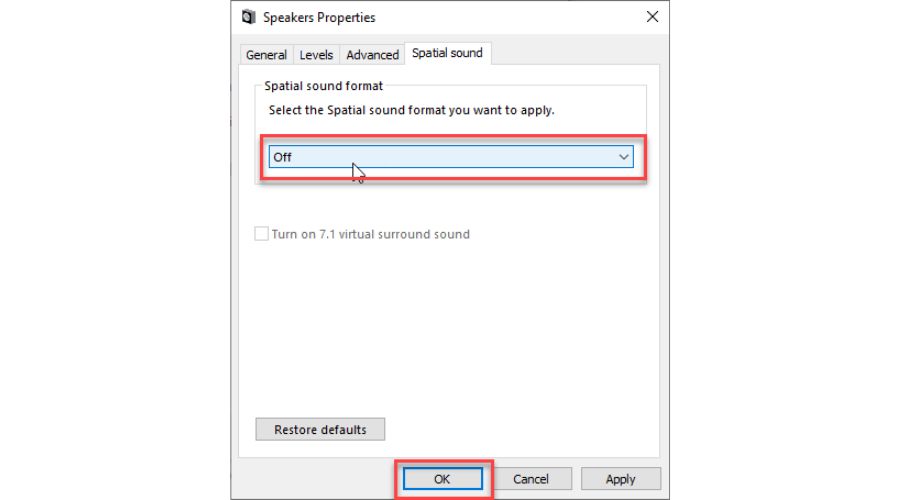
6. Close troubleshooter. This method solved my problem within the capabilities of the Audio Troubleshooter.
3. Use CHKDSK command
CHKDSK is a command that checks for logical and physical errors in the file system on your primary disk. The command only displays the volume’s status, but it can be used with additional parameters, such as /f, /b, /r, /x, etc to fix any errors found. There are also other parameters available for different uses.
I will guide you on how to use CHKDSK to fix errors, locate bad sectors, and recover data, for example, on my D volume:
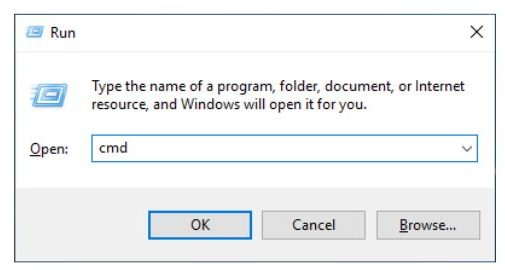
1. In the Run dialog box, type cmd and press Shift+Ctrl+Enter keys simultaneously to run Command Prompt as administrator.
2. Type; ‘chkdsk d: /f /r‘ and press Enter.
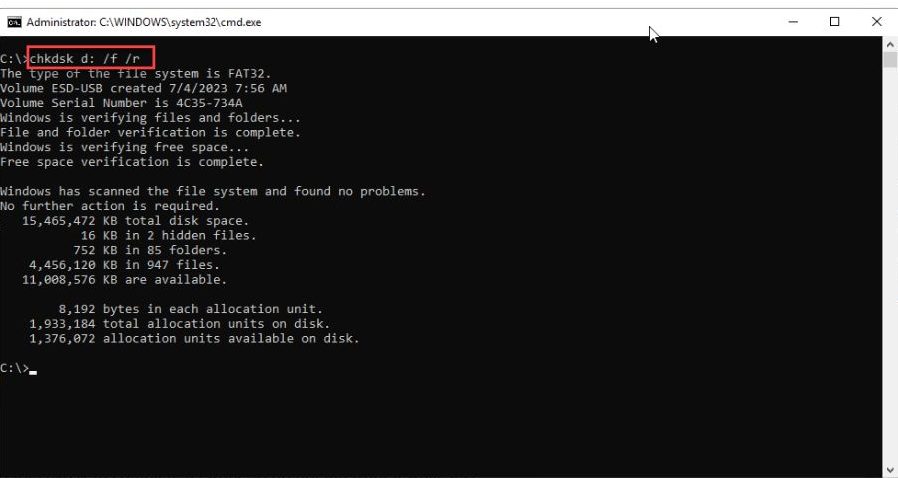
/f parameter fixes errors on the disk, and /r parameter locates bad sectors and recovers readable information. The disk must be locked for chkdsk to complete its work, so do not interrupt it while running.
4. Use the SFC tool
Windows 10 has a built-in tool called System File Checker (SFC). It scans your computer, checks the integrity of each system file, and repairs any corrupt or missing files. I’ll show you how to run SFC from Command Prompt as follows:
1. In the Run dialog box, type; cmd and press Shift+Ctrl+Enter to run Command Prompt as administrator.
2. Type; ‘sfc /scannow‘ and press Enter.
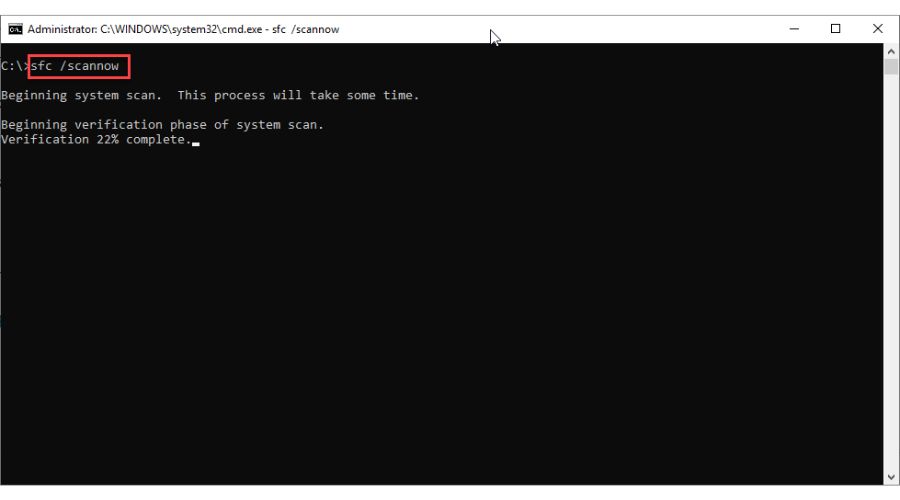
3. Wait until the scanning and repair process is finished.
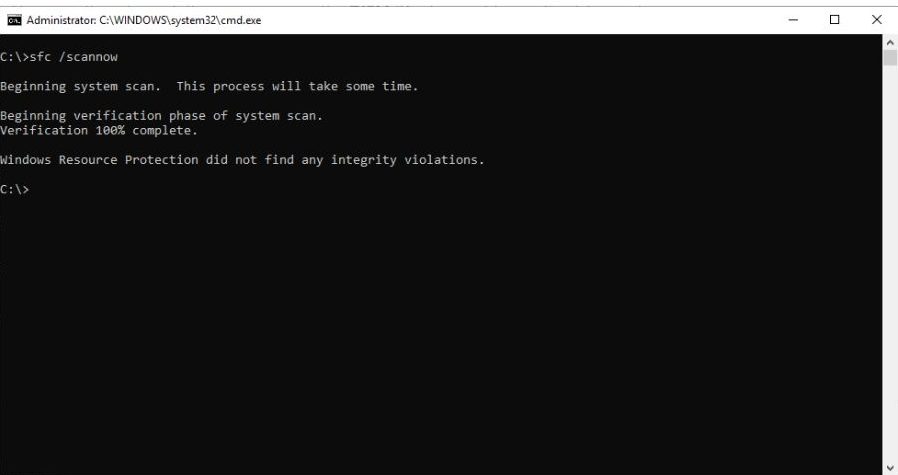
4. After SFC repairs the corrupt or missing files, restart your computer.
5. Use the DISM tool
If one or more files in the local Windows 10 image are damaged, you may find that the SFC command is ineffective. However, there is a solution – using the DISM (Deployment Image Servicing and Management) tool to repair the image. Once the image has been repaired, you can use the SFC tool to fix the setup without reinstalling Windows. DISM tool is available on Windows 10, which you can use to prepare, modify, and repair system images, including Windows Recovery Environment or Windows Setup. In addition, you can also use it to fix system issues with the local recovery image.
I’ll show you how to use the DISM tool from the command prompt:
1. Run cmd from the Run dialog box as administrator.
2. Type; ‘DISM /Online /Cleanup-Image /RestoreHealth‘ and press Enter.
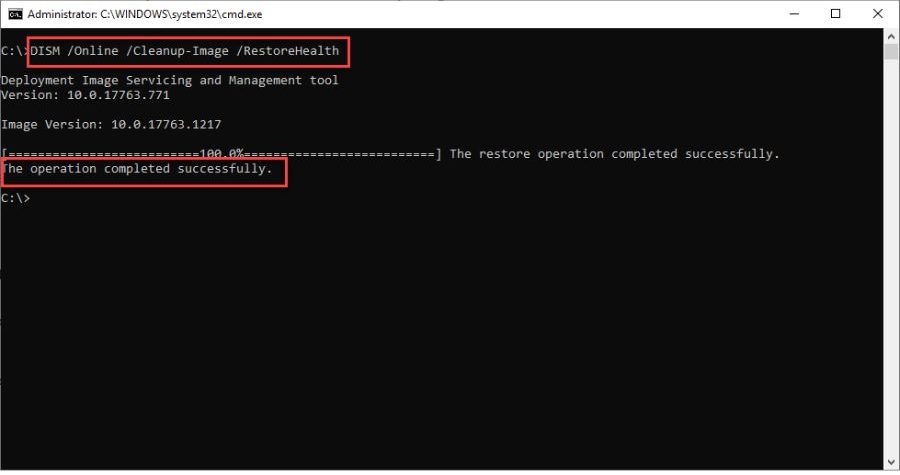
3. Wait until you see the message ‘The operation completed successfully.’ After that, use the SFC tool like in step 4.
6. Use the Windows Network Reset tool
If you’re experiencing network issues on your Windows 10 PC, you may want to try using the Network Reset tool. This feature is specifically designed to repair complex network connectivity issues that the basic Network Troubleshooter may be unable to fix. The Network Reset tool works by reinstalling the network adapters and resetting the networking components to their default settings.
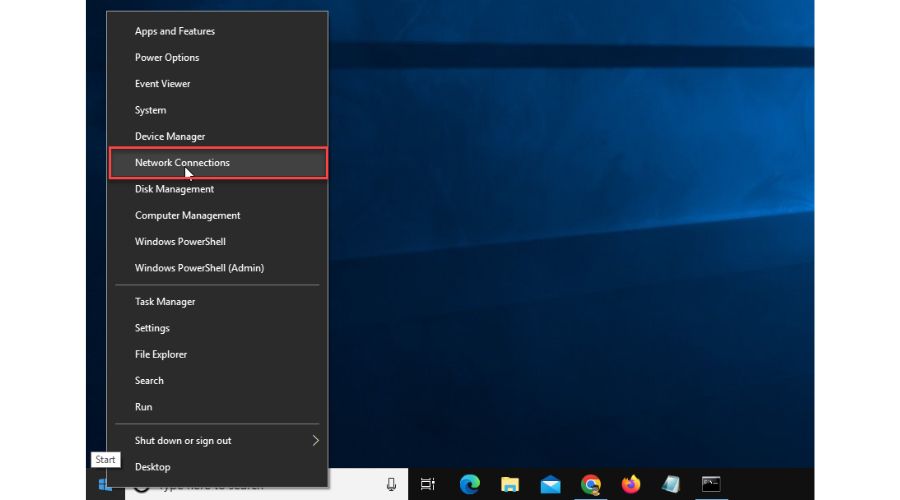
Now, I’ll show you how to run and use this helpful tool easily:
1. Right-click on Windows Start and choose ‘Network connections‘ from the quick menu.
2. Click the Status option from the left pane and choose ‘Network reset.’
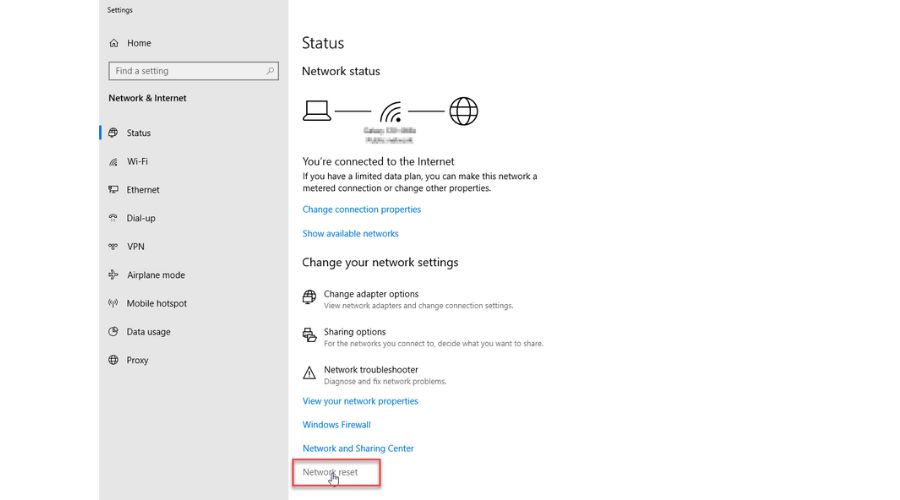
3. Click ‘Reset now‘ and choose Yes, then OK.

4. Reset your PC and check if the network issues are solved.
7. Update/reinstall your drivers
Outdated or corrupted system drivers can cause issues in Windows 10. To avoid these problems, you can remove incompatible drivers or update/reinstall outdated drivers using the Device Manager. I will show you how to upgrade your network adapter driver:
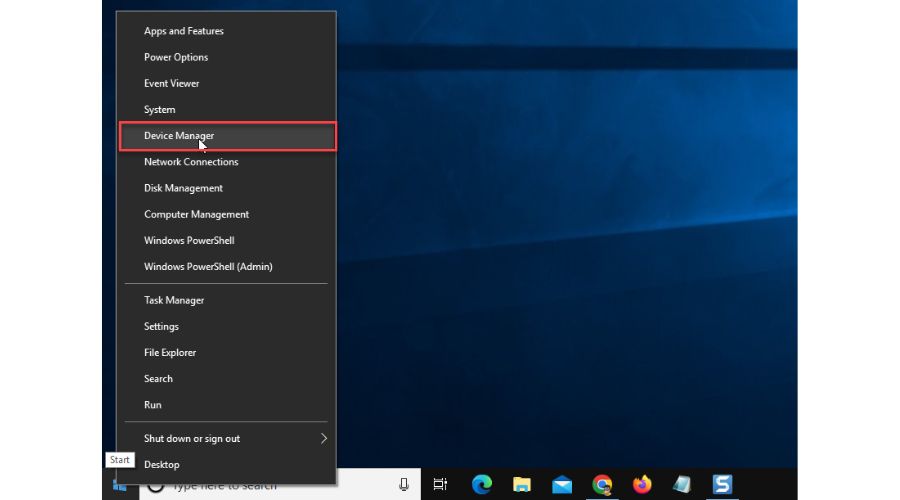
1. Right-click Windows Start and select Device Manager.
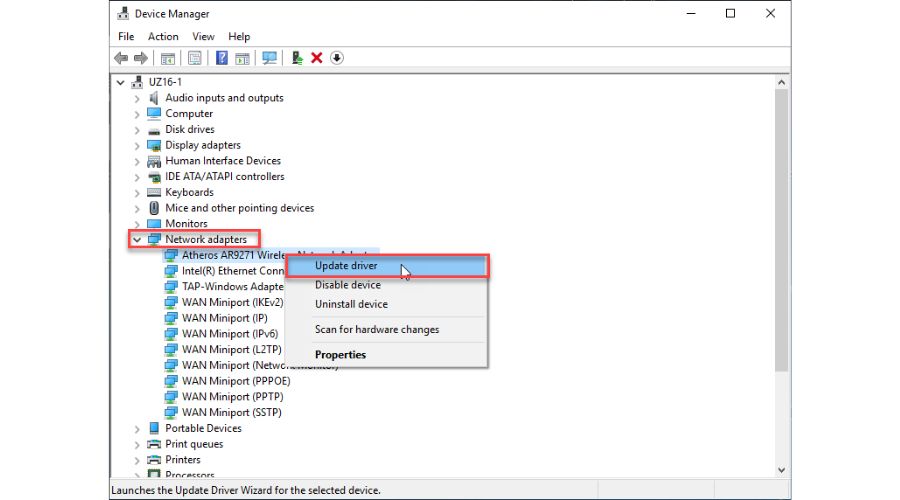
2. Double-click the ‘Network adapters‘ to expand.
3. Right-click on your network card to select ‘Update driver.’
4. Click on ‘Search automatically for updated driver software.’
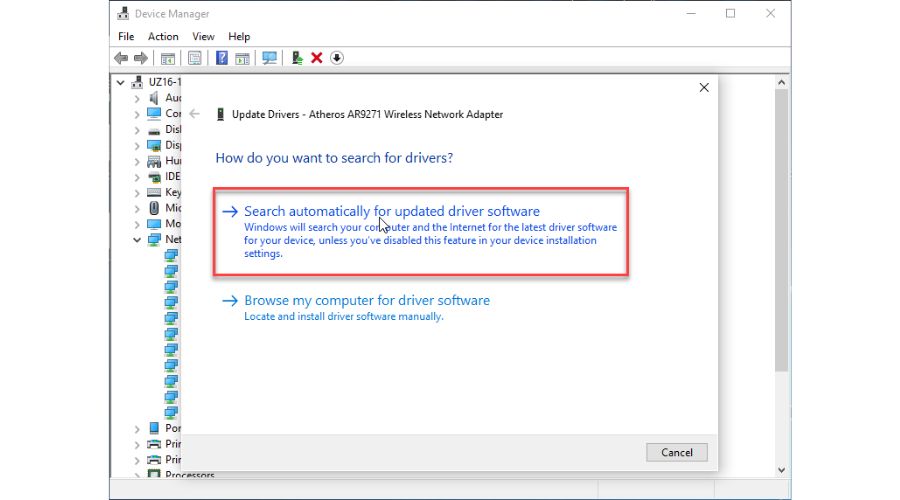
5. Follow the on-screen guide to finishing updating your network adapter driver.
Similarly, you can uninstall your driver and let Windows automatically download the latest available through Windows Update. Although Device Manager is a convenient way to upgrade or repair your device drivers, I would still recommend that you download the latest original drivers from the official website of your hardware manufacturer.
8. Use System Restore
System Restore is a Windows tool designed to protect and repair computer software. It allows you to take a snapshot of essential system files and the Windows registry and save them as Restore Points. In case of an installation failure or a Windows 10 corruption, you can restore the system to a working condition using the restore point you previously created. This eliminates the need to reinstall the operating system, saving you time and effort.
First, I’ll suggest you to check if System Restore is turned on at all:
1. Click on the search bar and type; ‘restore.’
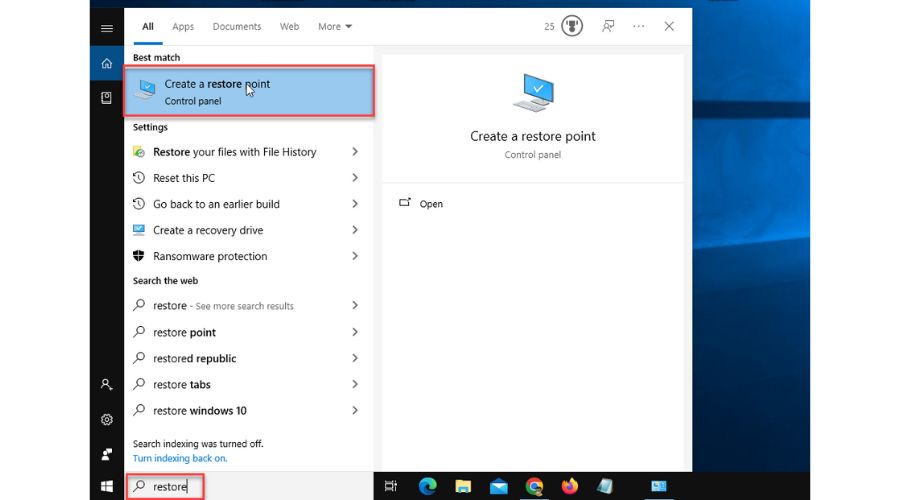
2. Click ‘Create a restore point‘ in the search result.
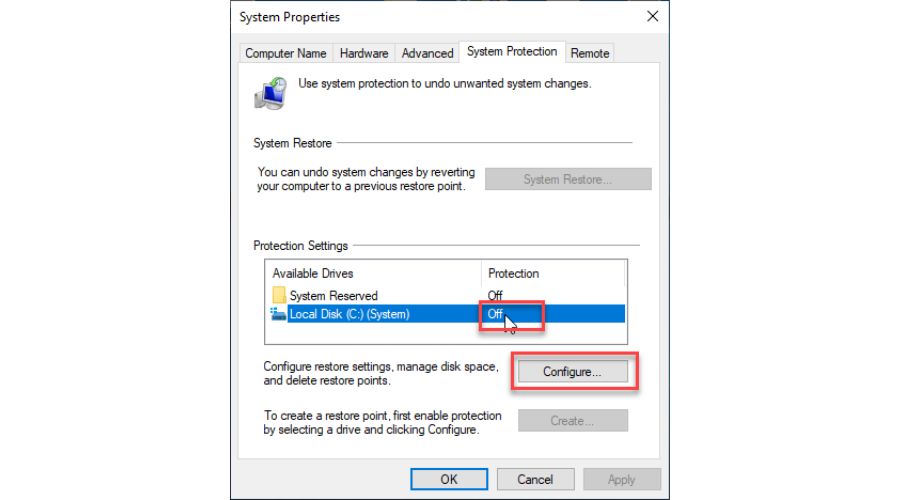
3. Select the System Protection tab. If protection is ‘Off,’ you need first to enable it. Select your primary drive and click Configure.
4. Select the radio button ‘Turn on system protection.’
5. Under Disk Space Usage, move the slider to 5% for optimal disk space used for system protection.
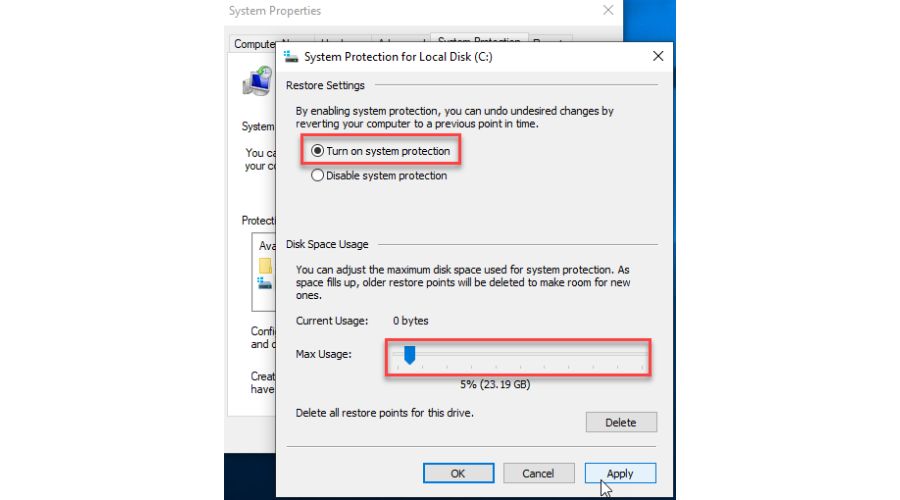
Each restore point requires around 1GB of your disk space. I recommend allocating 2-10% of total storage for restore points. More space means more restore points can be stored. Set the limit according to your needs, but you shouldn’t go more than 5% for regular home users.
6. Click Apply and OK and return to the System Protection tab.
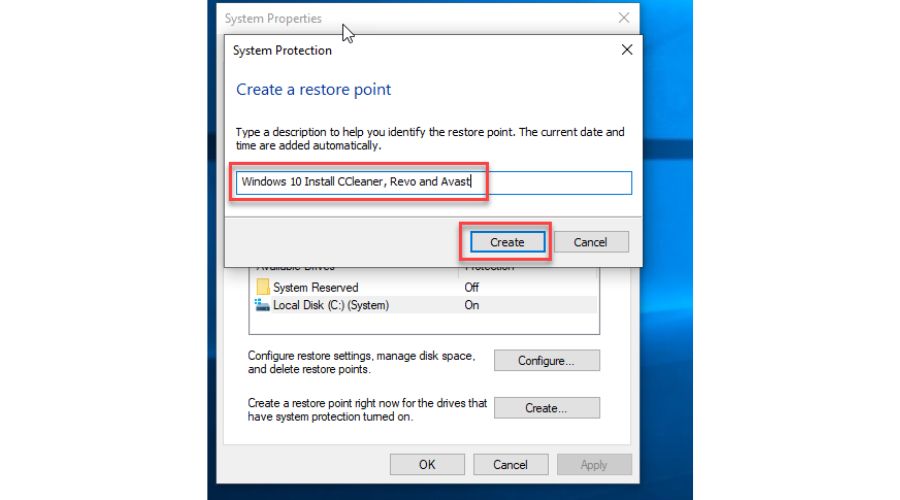
7. Now, select your system drive and click Create.

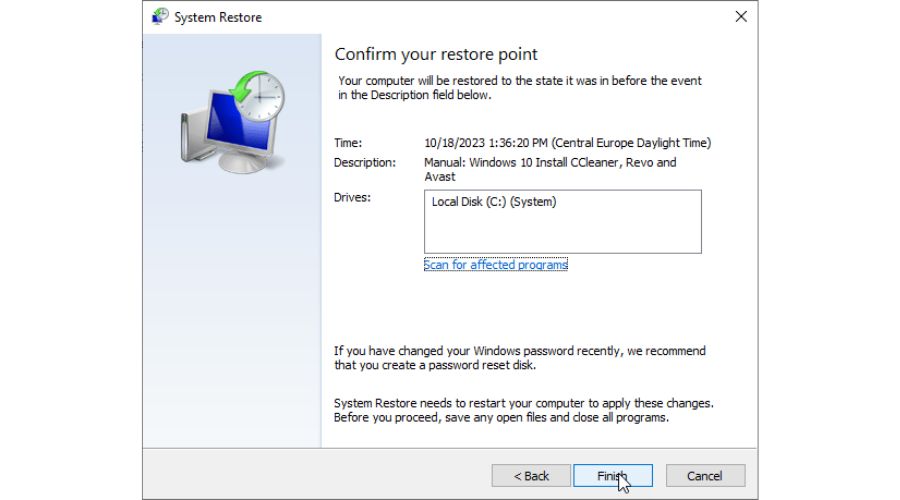
8. Enter a description for the system restore point. I recommend it be as detailed as possible, like when I installed Revo Uninstaller, Avast Cleanup, and CCleaner. Click on the Create.
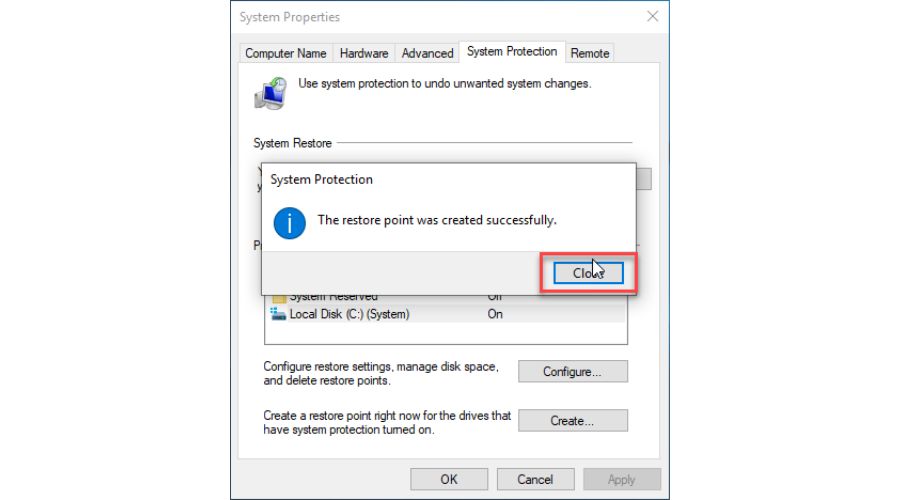
9. Windows 10 will create a system restore point. Wait a while and click Close when complete.
When it comes to restoring your PC from a System Restore Point, do the following steps:
1. Click on the search bar and type; ‘recovery.’
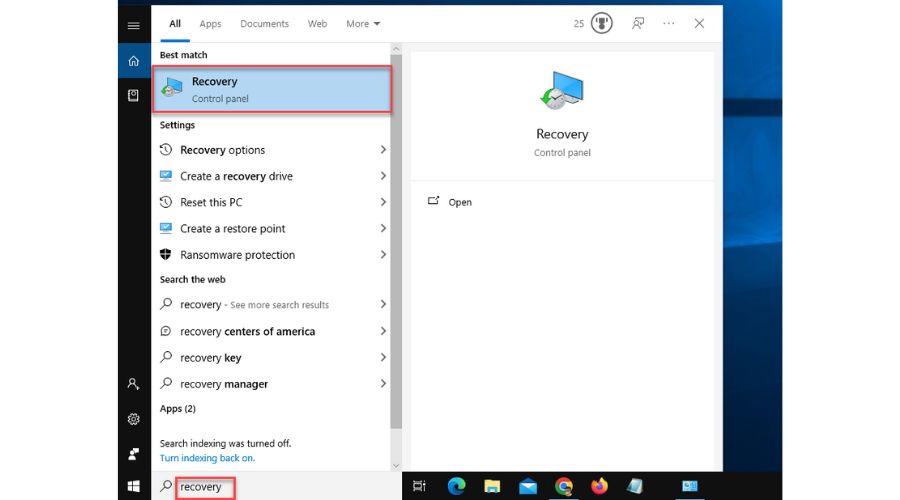
2. Click ‘Recovery‘ in the search result.
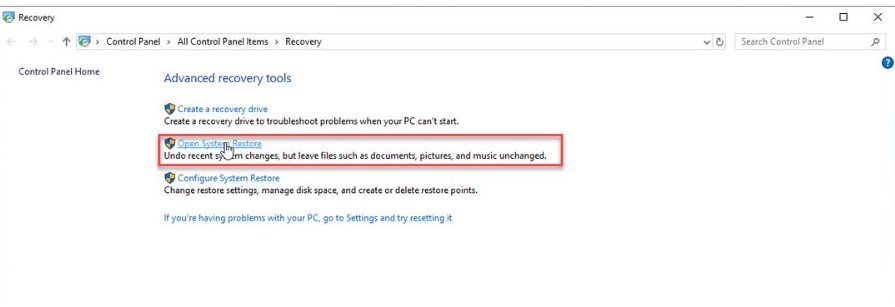
3. Select ‘Open System Restore.’
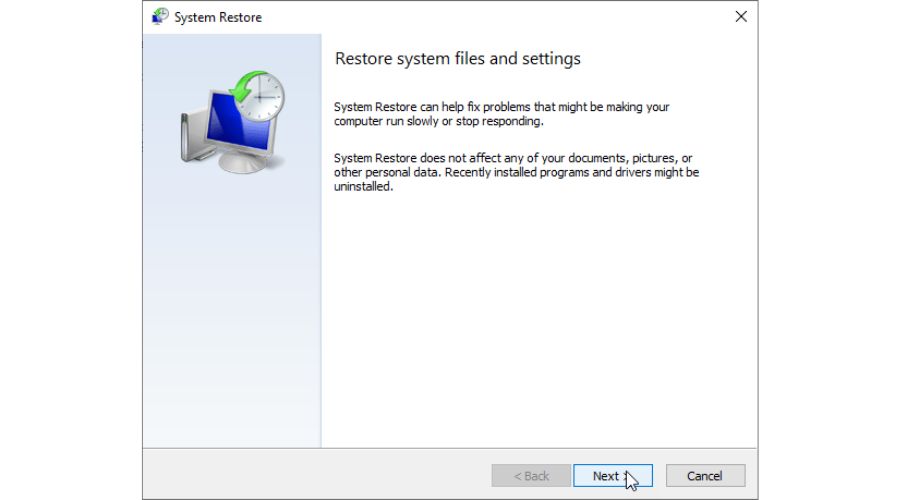
4. Click on the Next.
5. Select your preferred system restore point and click Next.
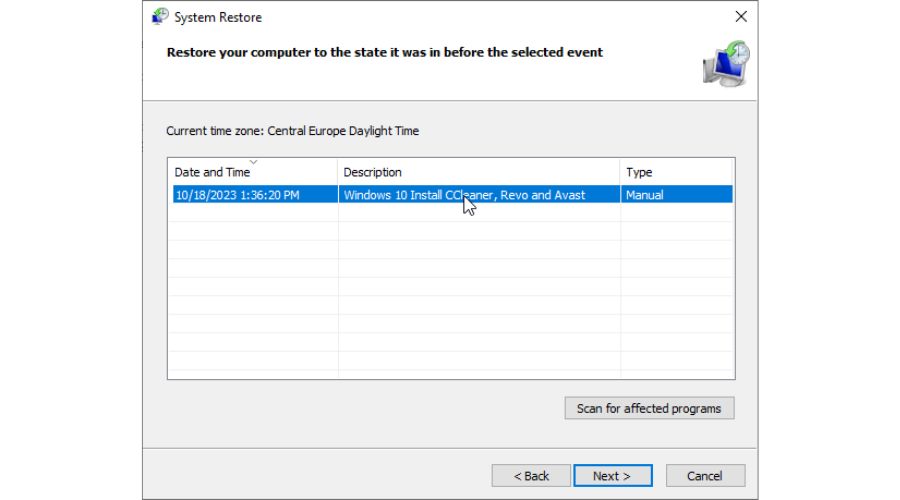
6. I recommend that you double-check that you have chosen the correct restore point so that you don’t have problems later. When you’re sure, click Finish and wait for Windows to return to its pre-problem state.
Summary
In this article, I have shown you some of the most important tools that you can use to repair your tired and sluggish Windows 10. All these tools and methods are available in Windows, and there is no need to pay for third-party programs as long as you can handle the OS problems yourself.

Vladimir Popescu
Verified at:
07/03/2023 10:31
Vladimir started writing articles about Windows because he has a natural interest in this topic, and he has been an avid professional user with more than 15 years of experience. He’s also been writing for WindowsReport.com, MSPoweruser.com and present in various other online publications on matters related to Windows and Windows servers.
Vladimir enjoys practicing Crossfit and making art when he’s not creating top articles with in-depth information.
Leave a Reply